Written Warnings in Tyfoom
In this guide, we will go over how to customize and dismiss written warnings in Tyfoom.
Log into tyfoom.com
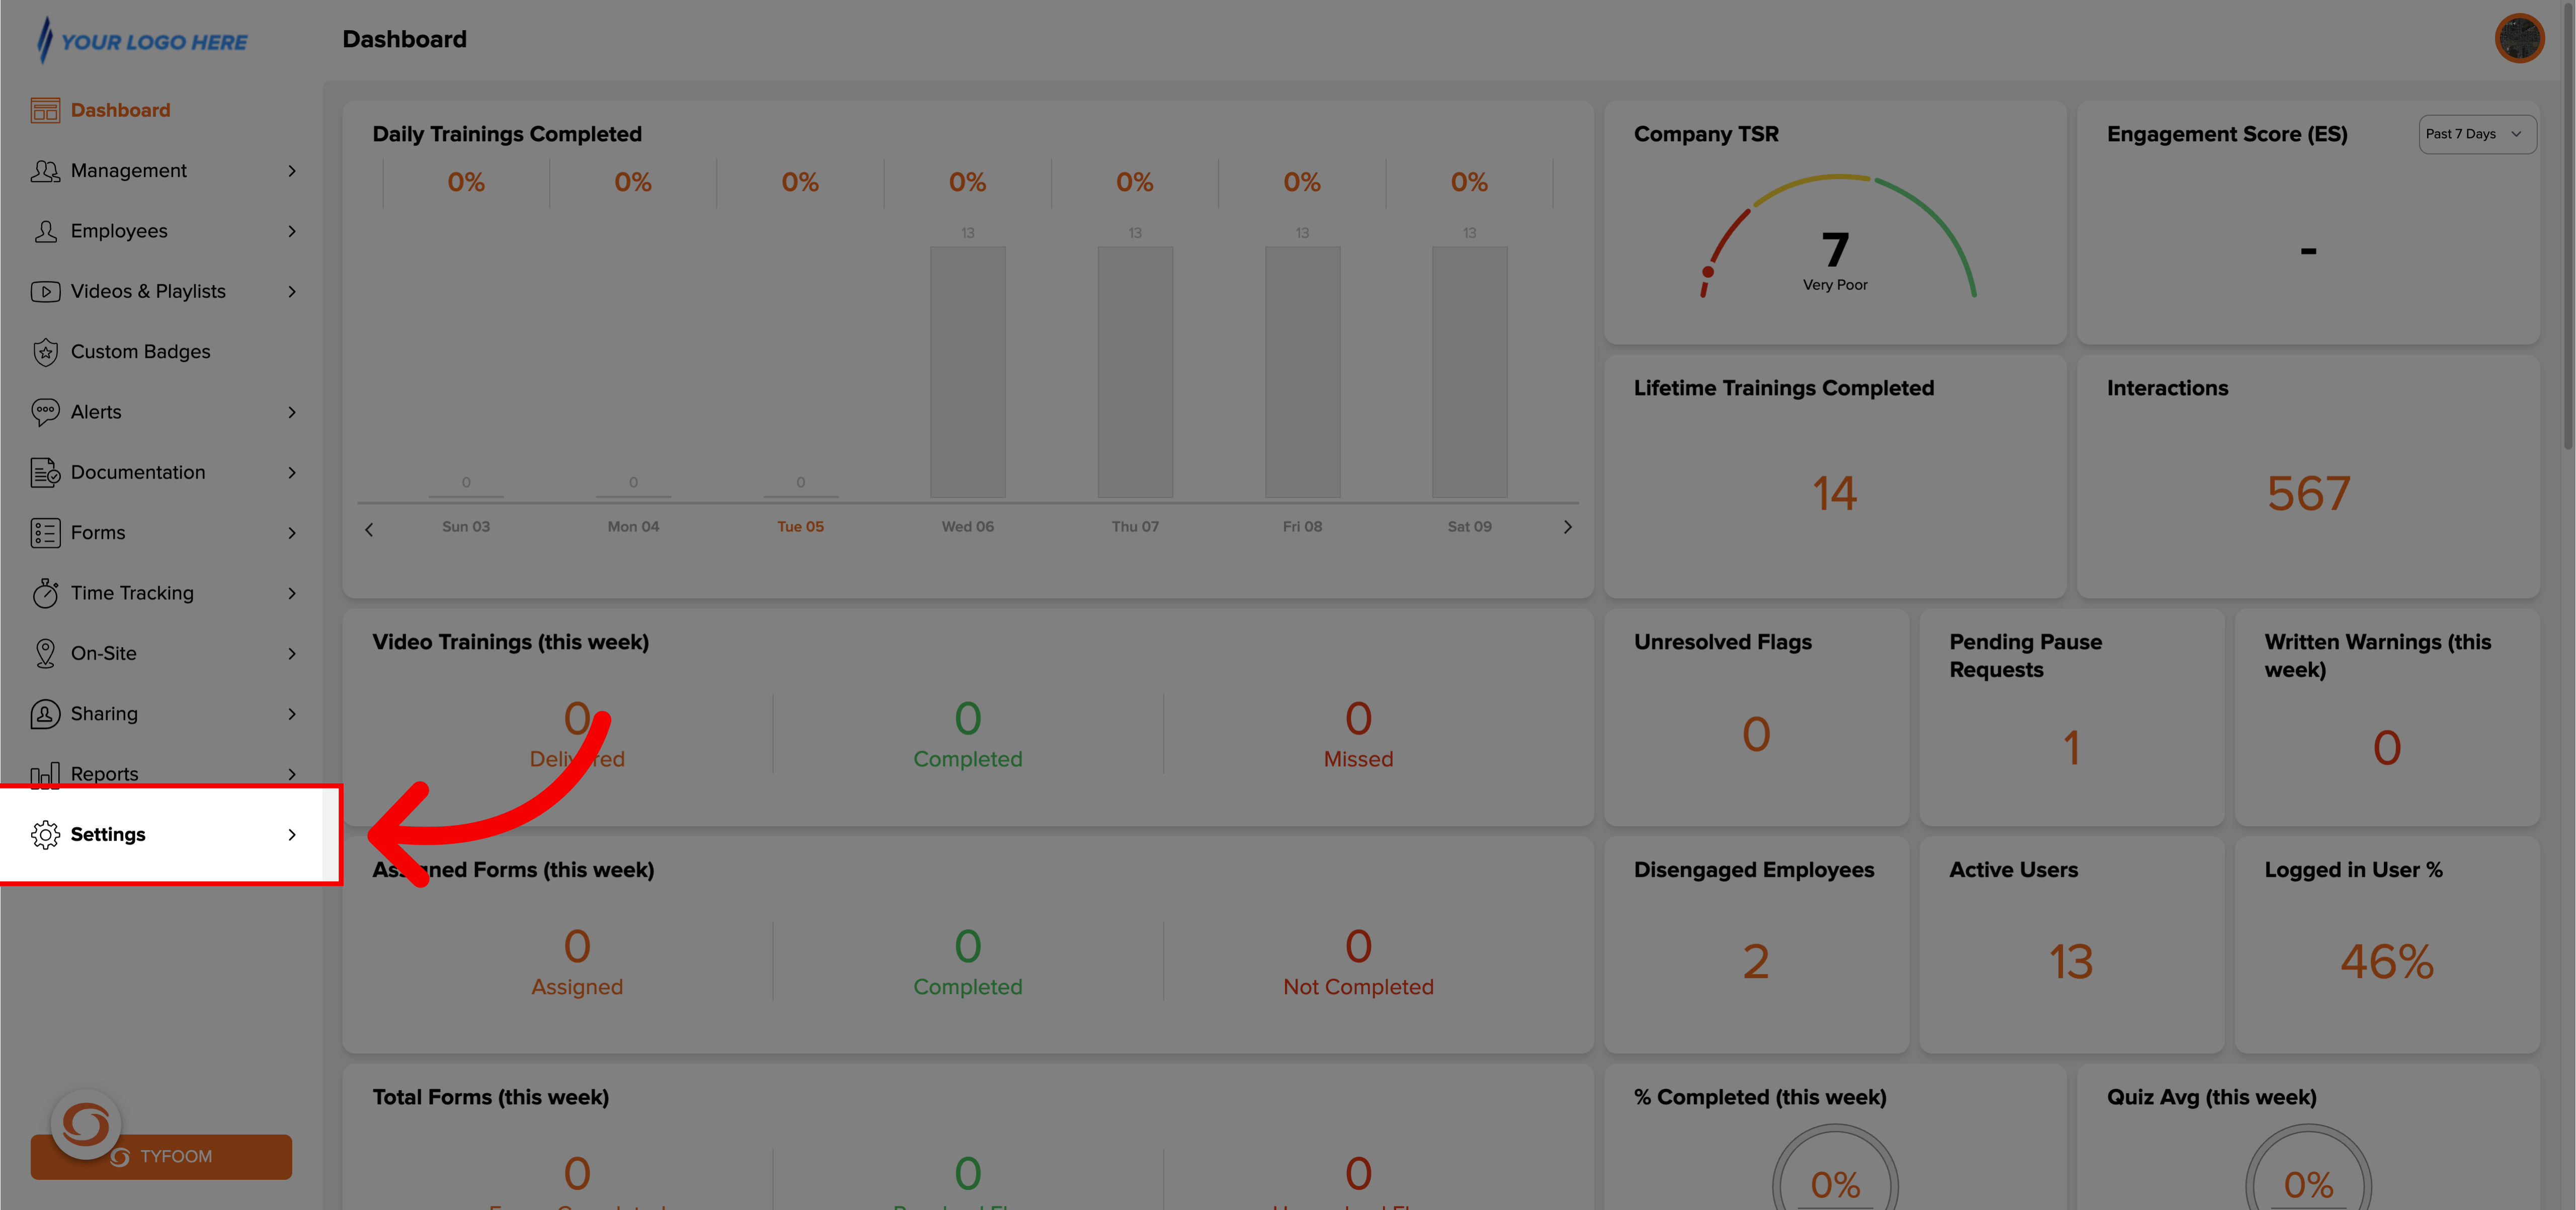
1. Go to "Settings"
First, we'll start with customizing notifications for written warning. To get started go to Settings.
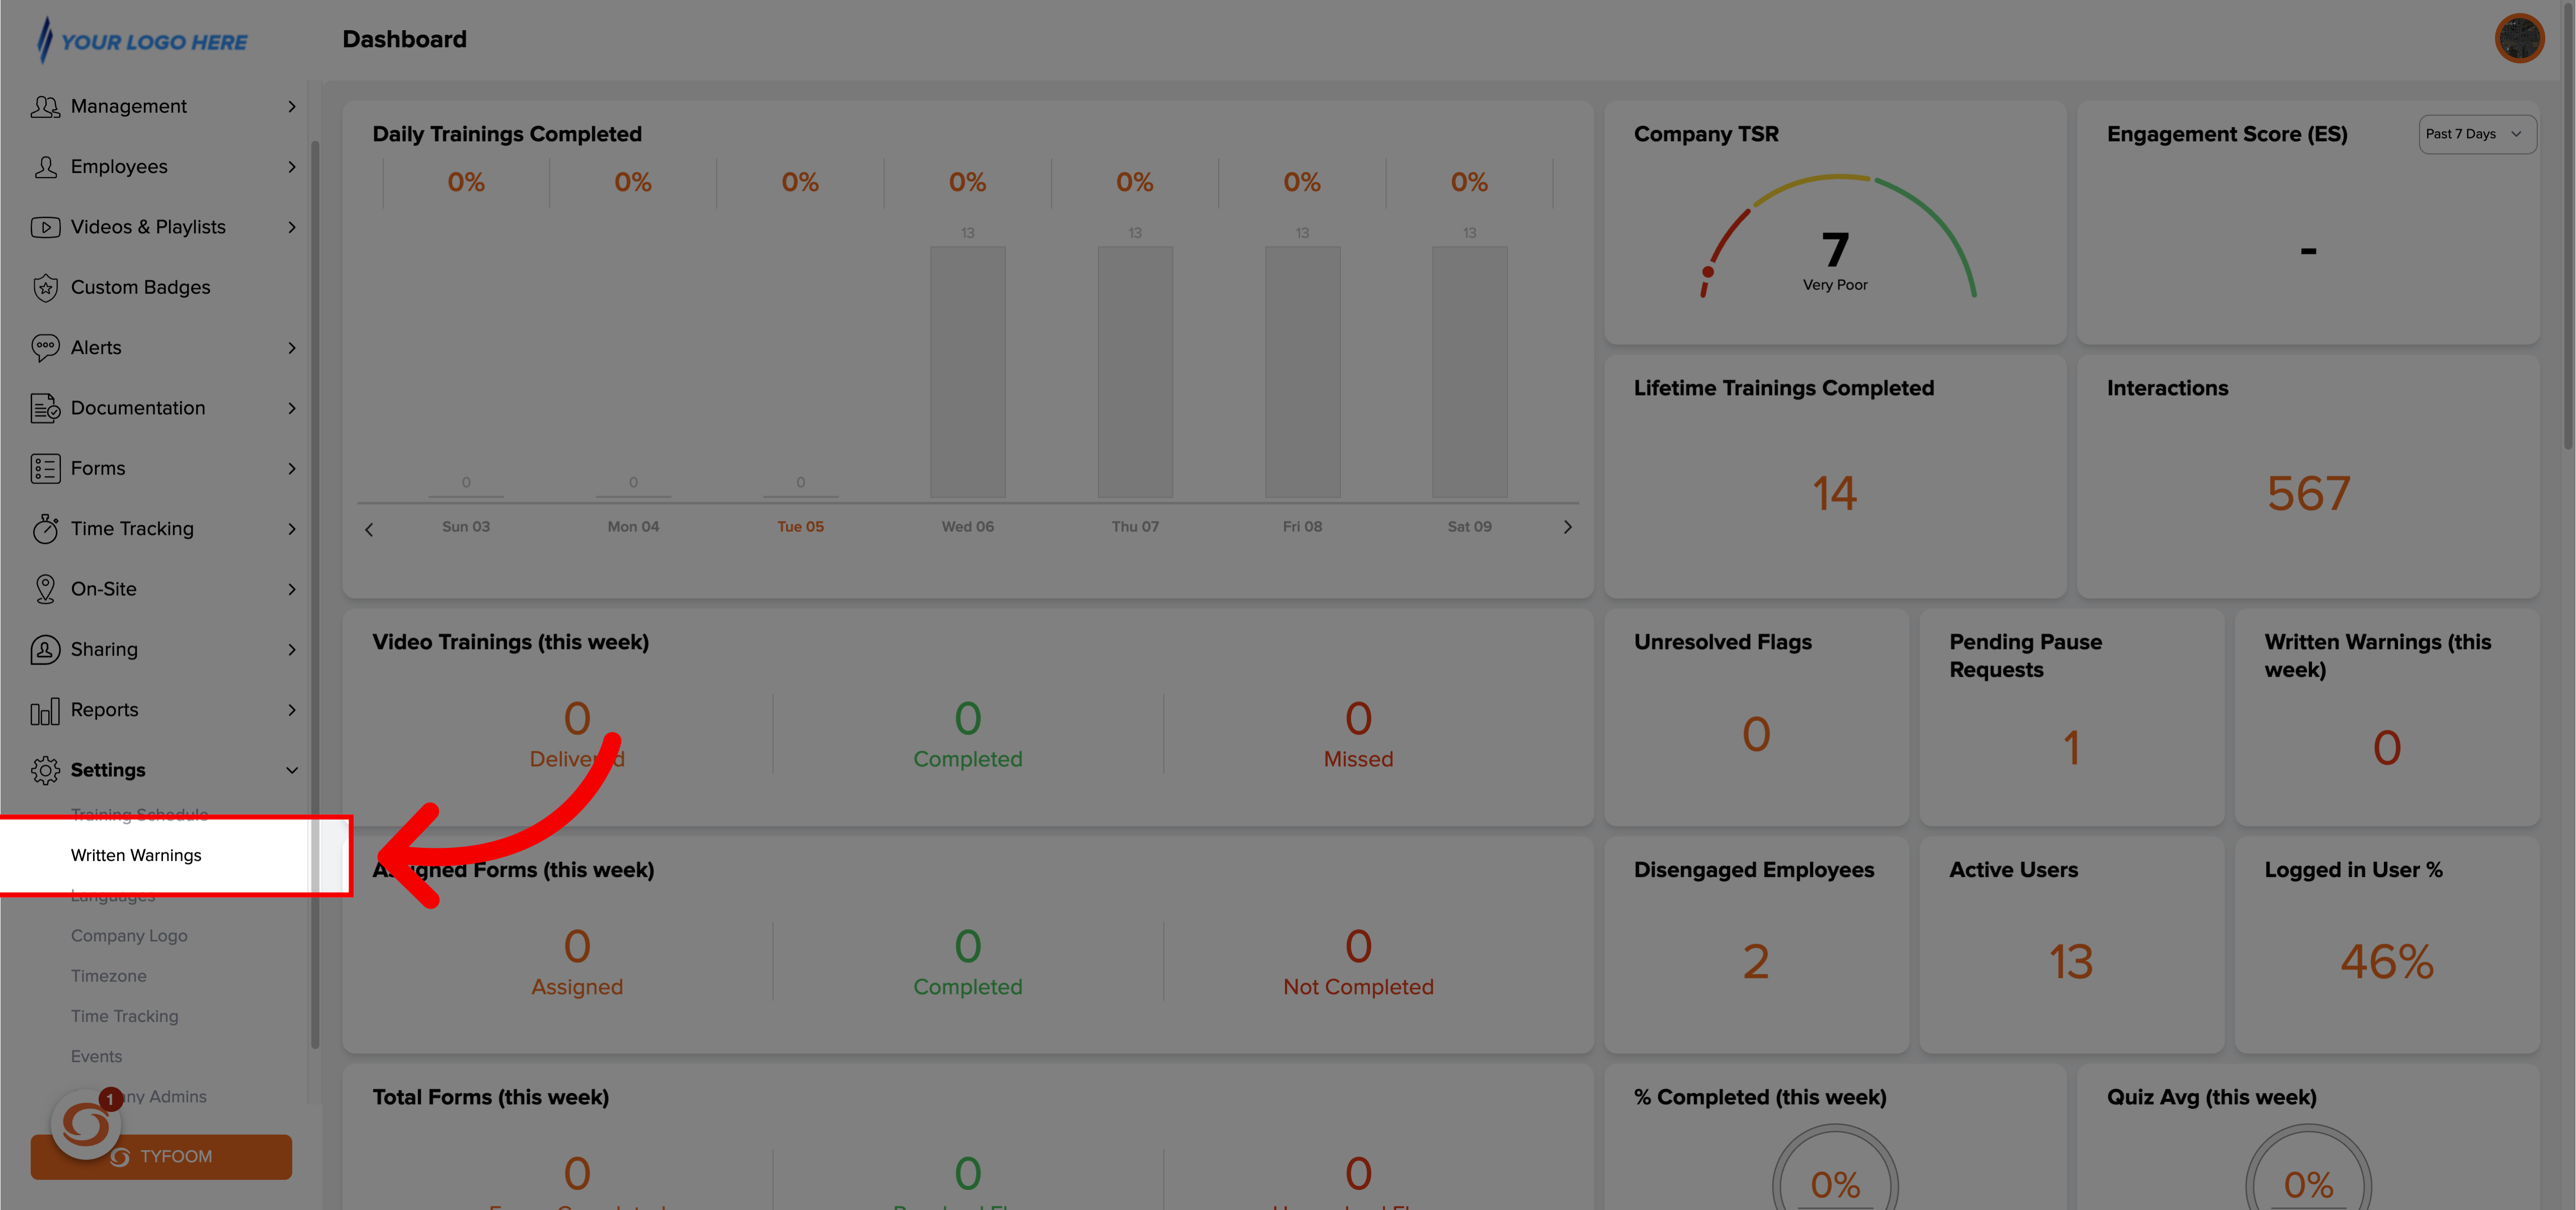
2. Click "Written Warnings"
Go to the Written Warnings section.
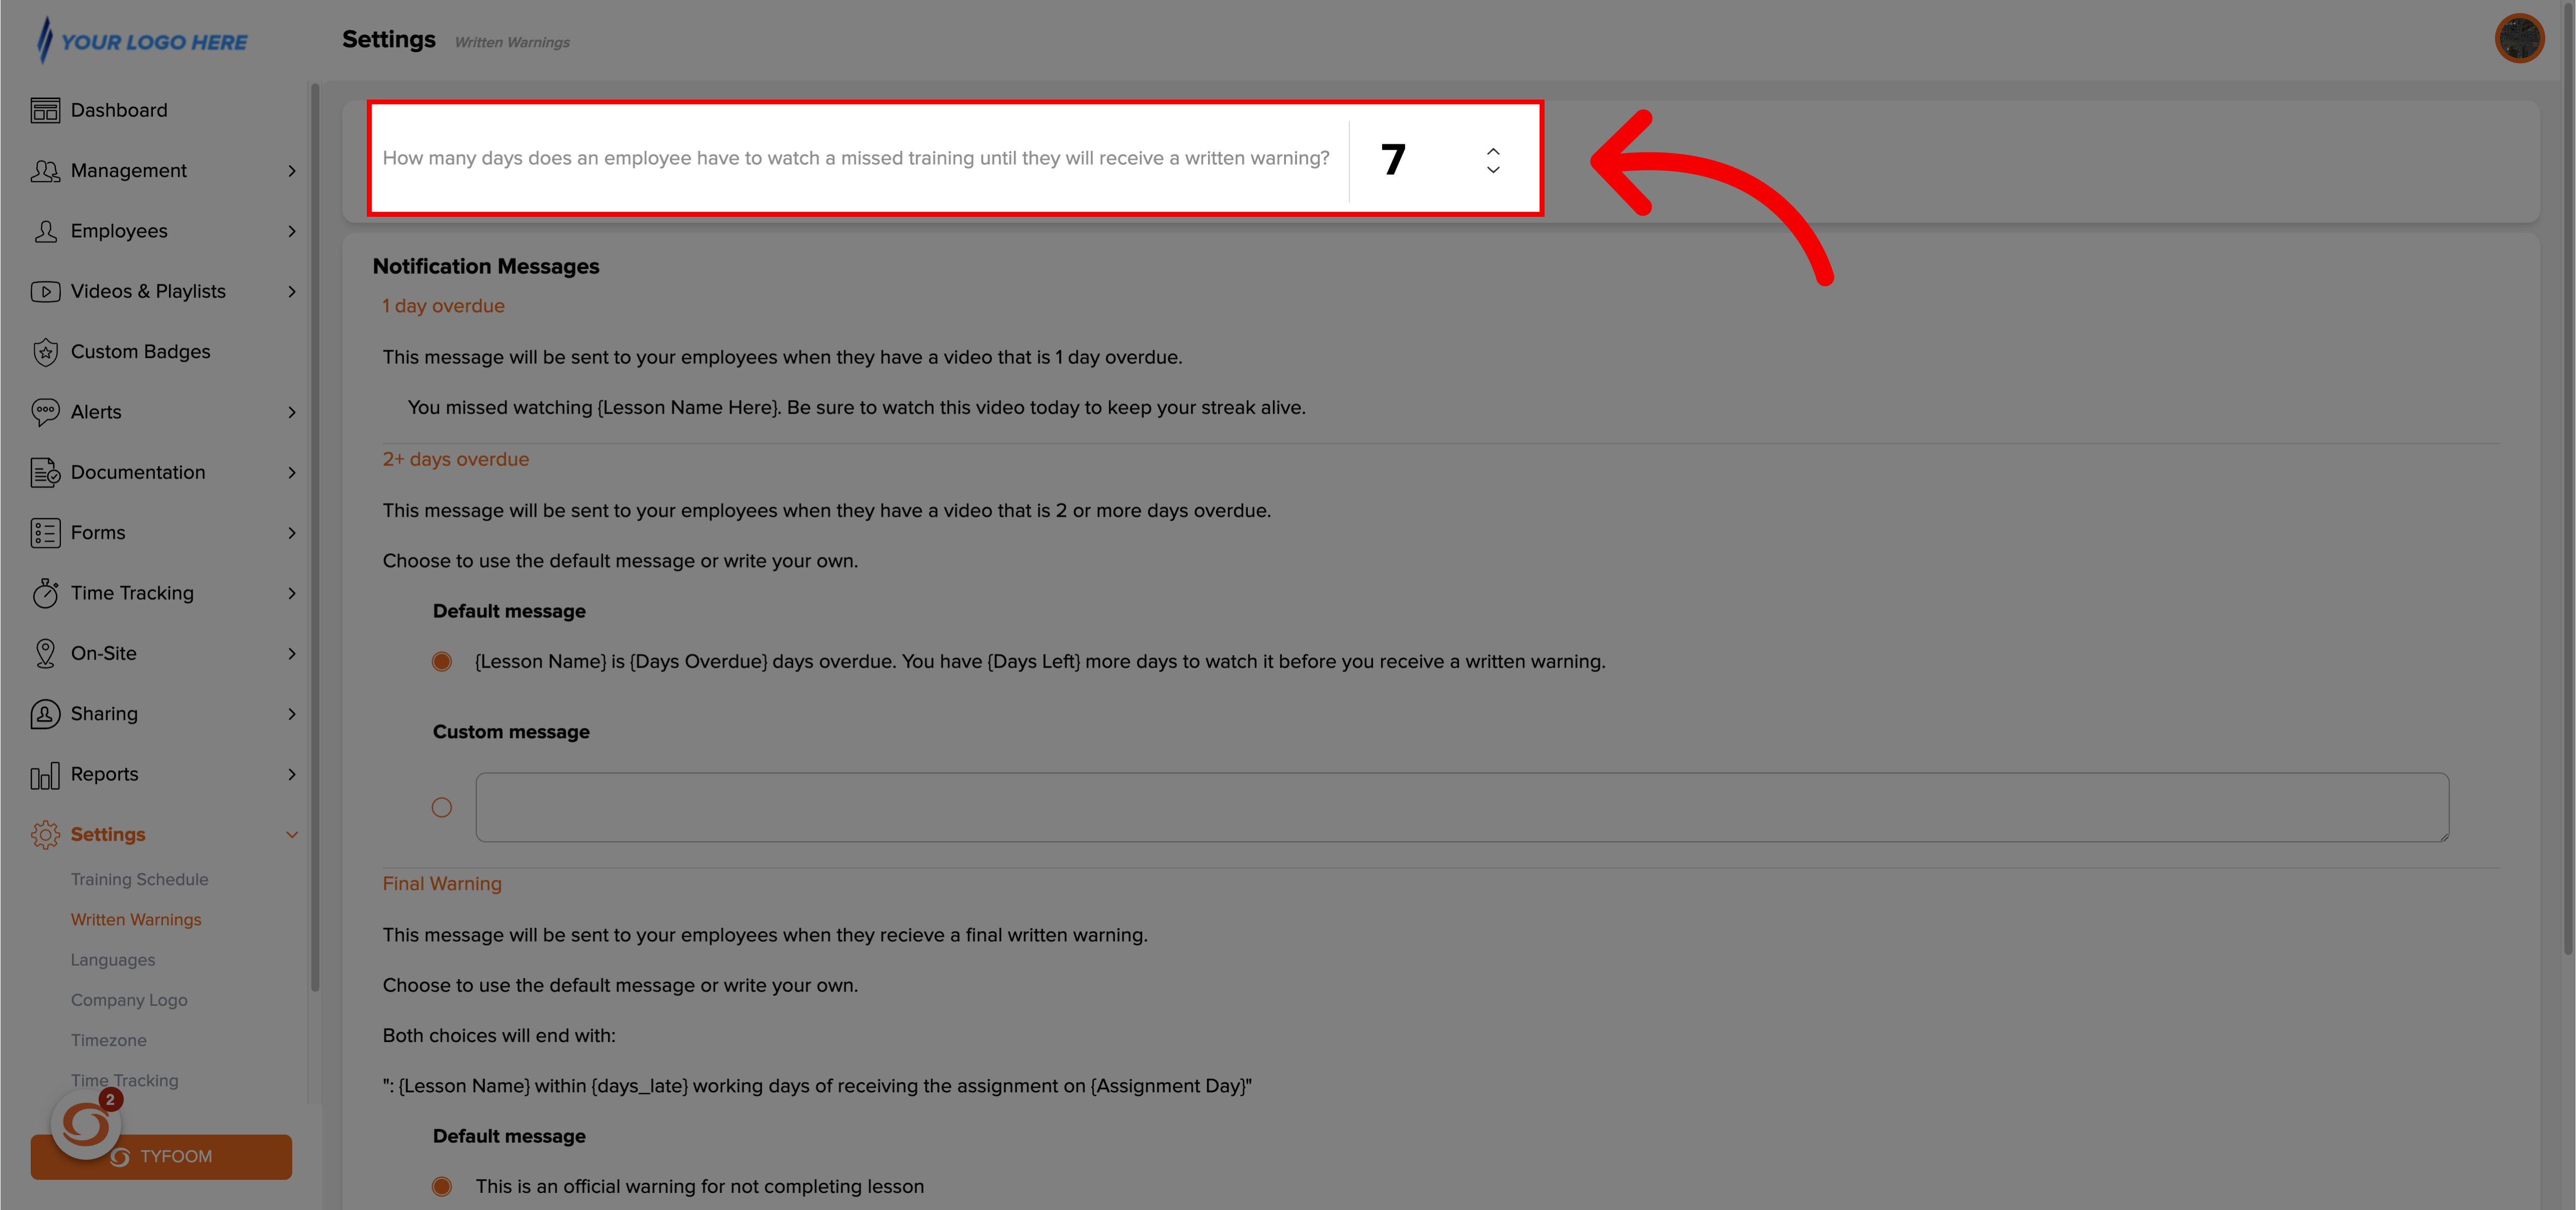
3. Choose time period
First, you will choose how long an employee has to watch a missed training until you receive a written warning.
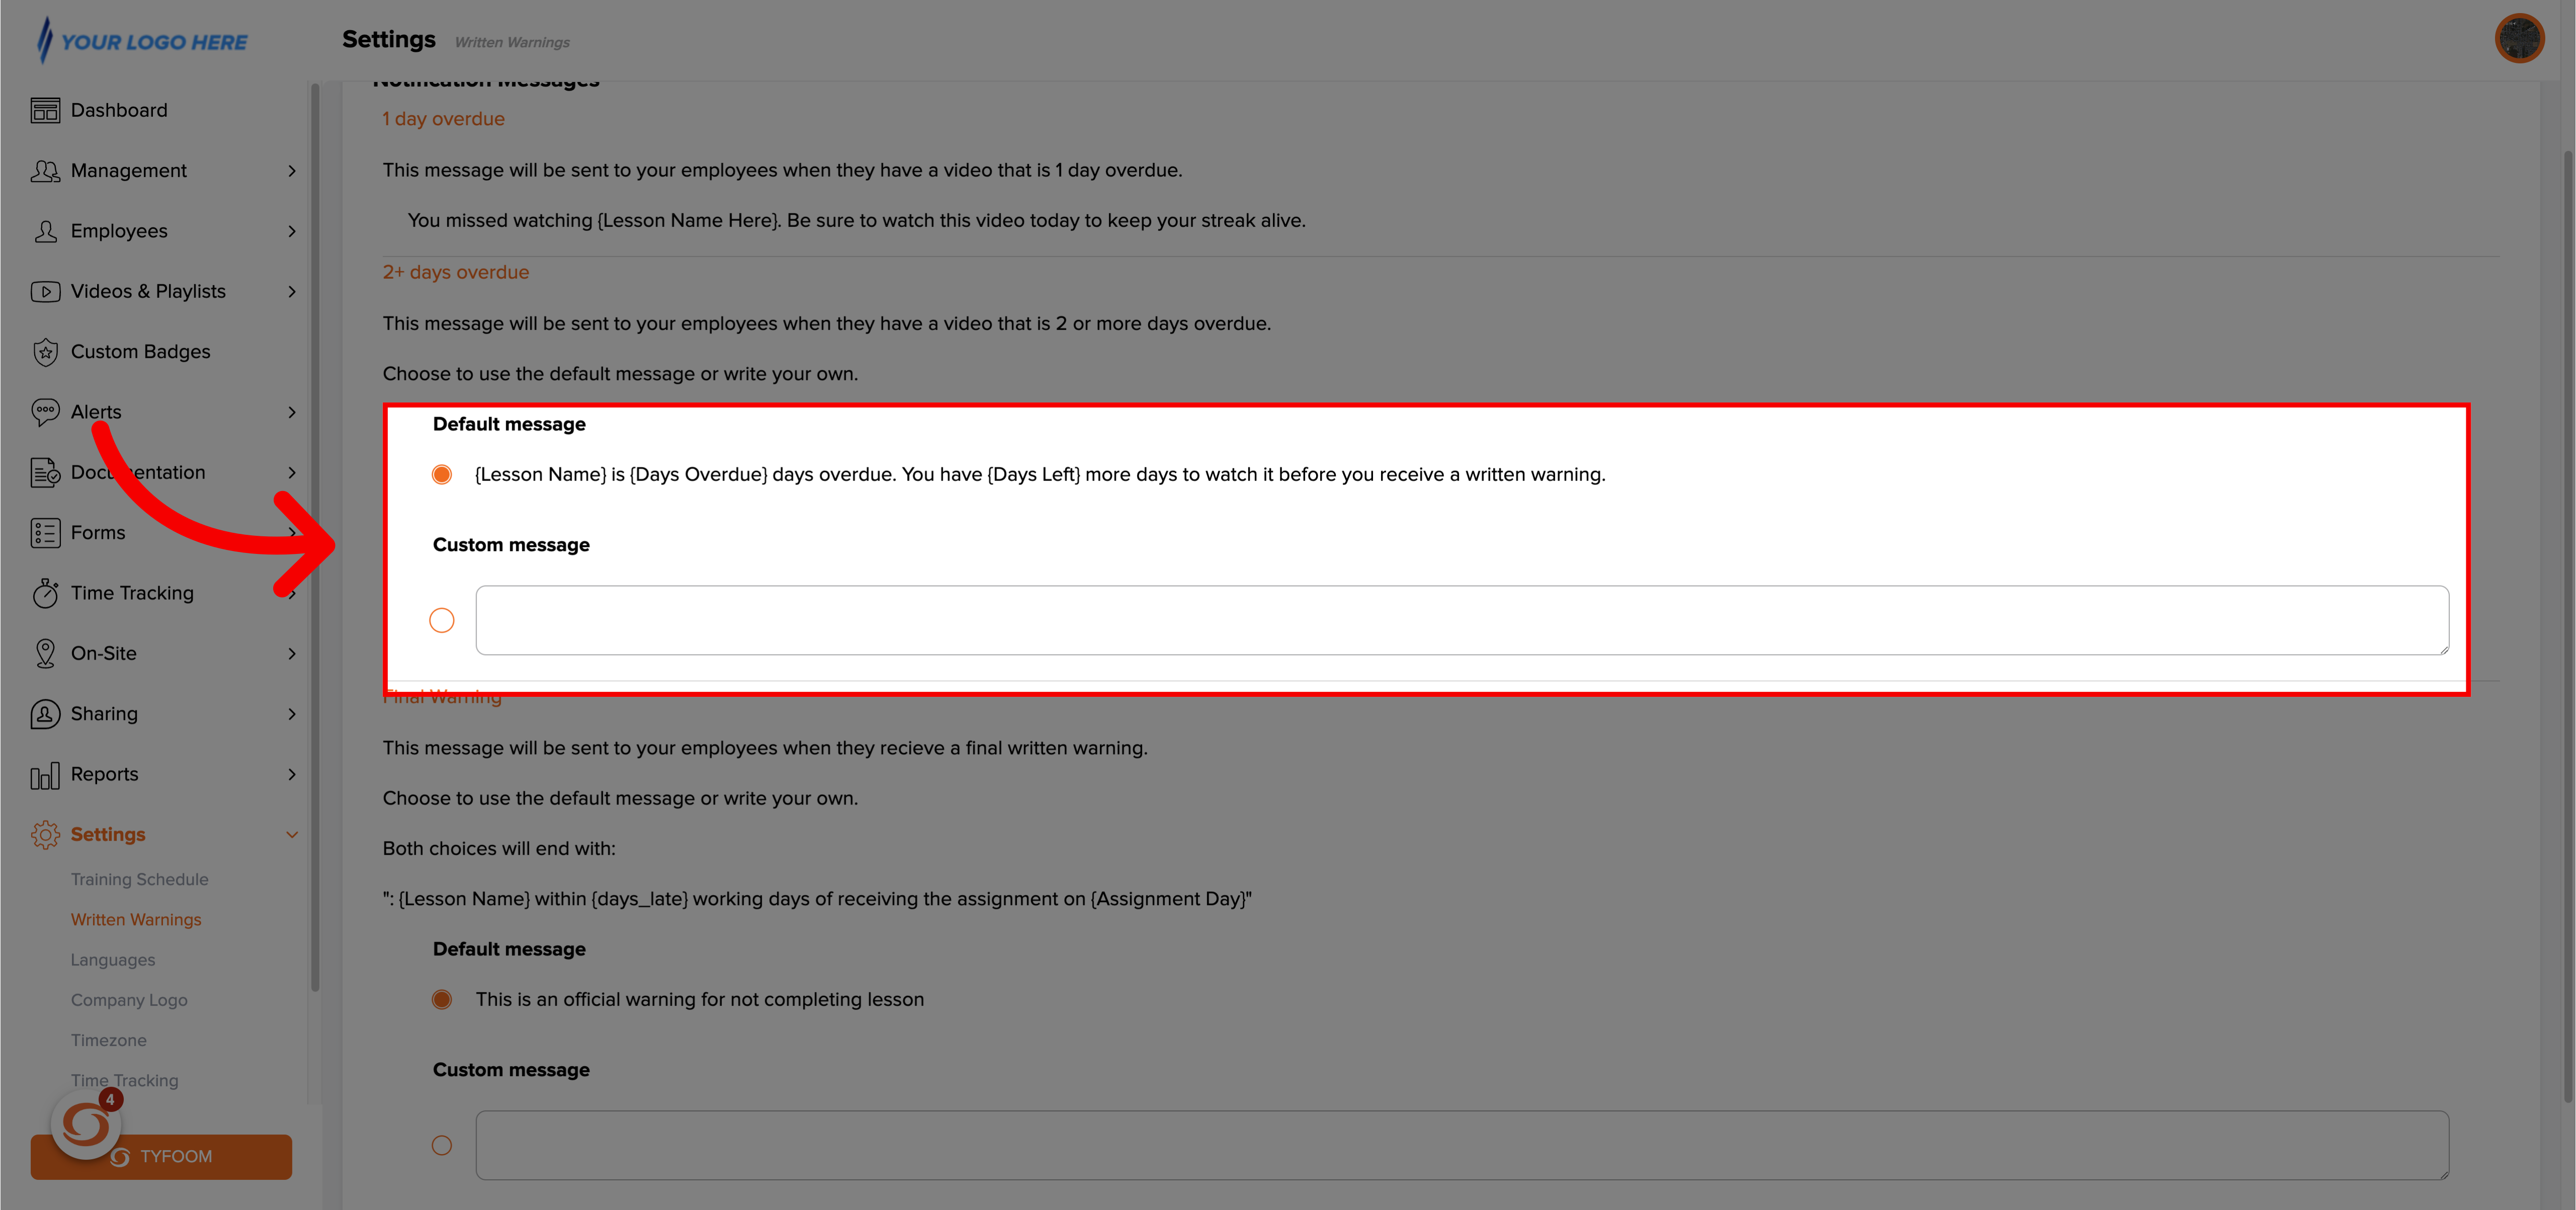
4. Edit 1st Default Message
Then, choose to use either the default message, or to create a custom message for when the training is two days late.
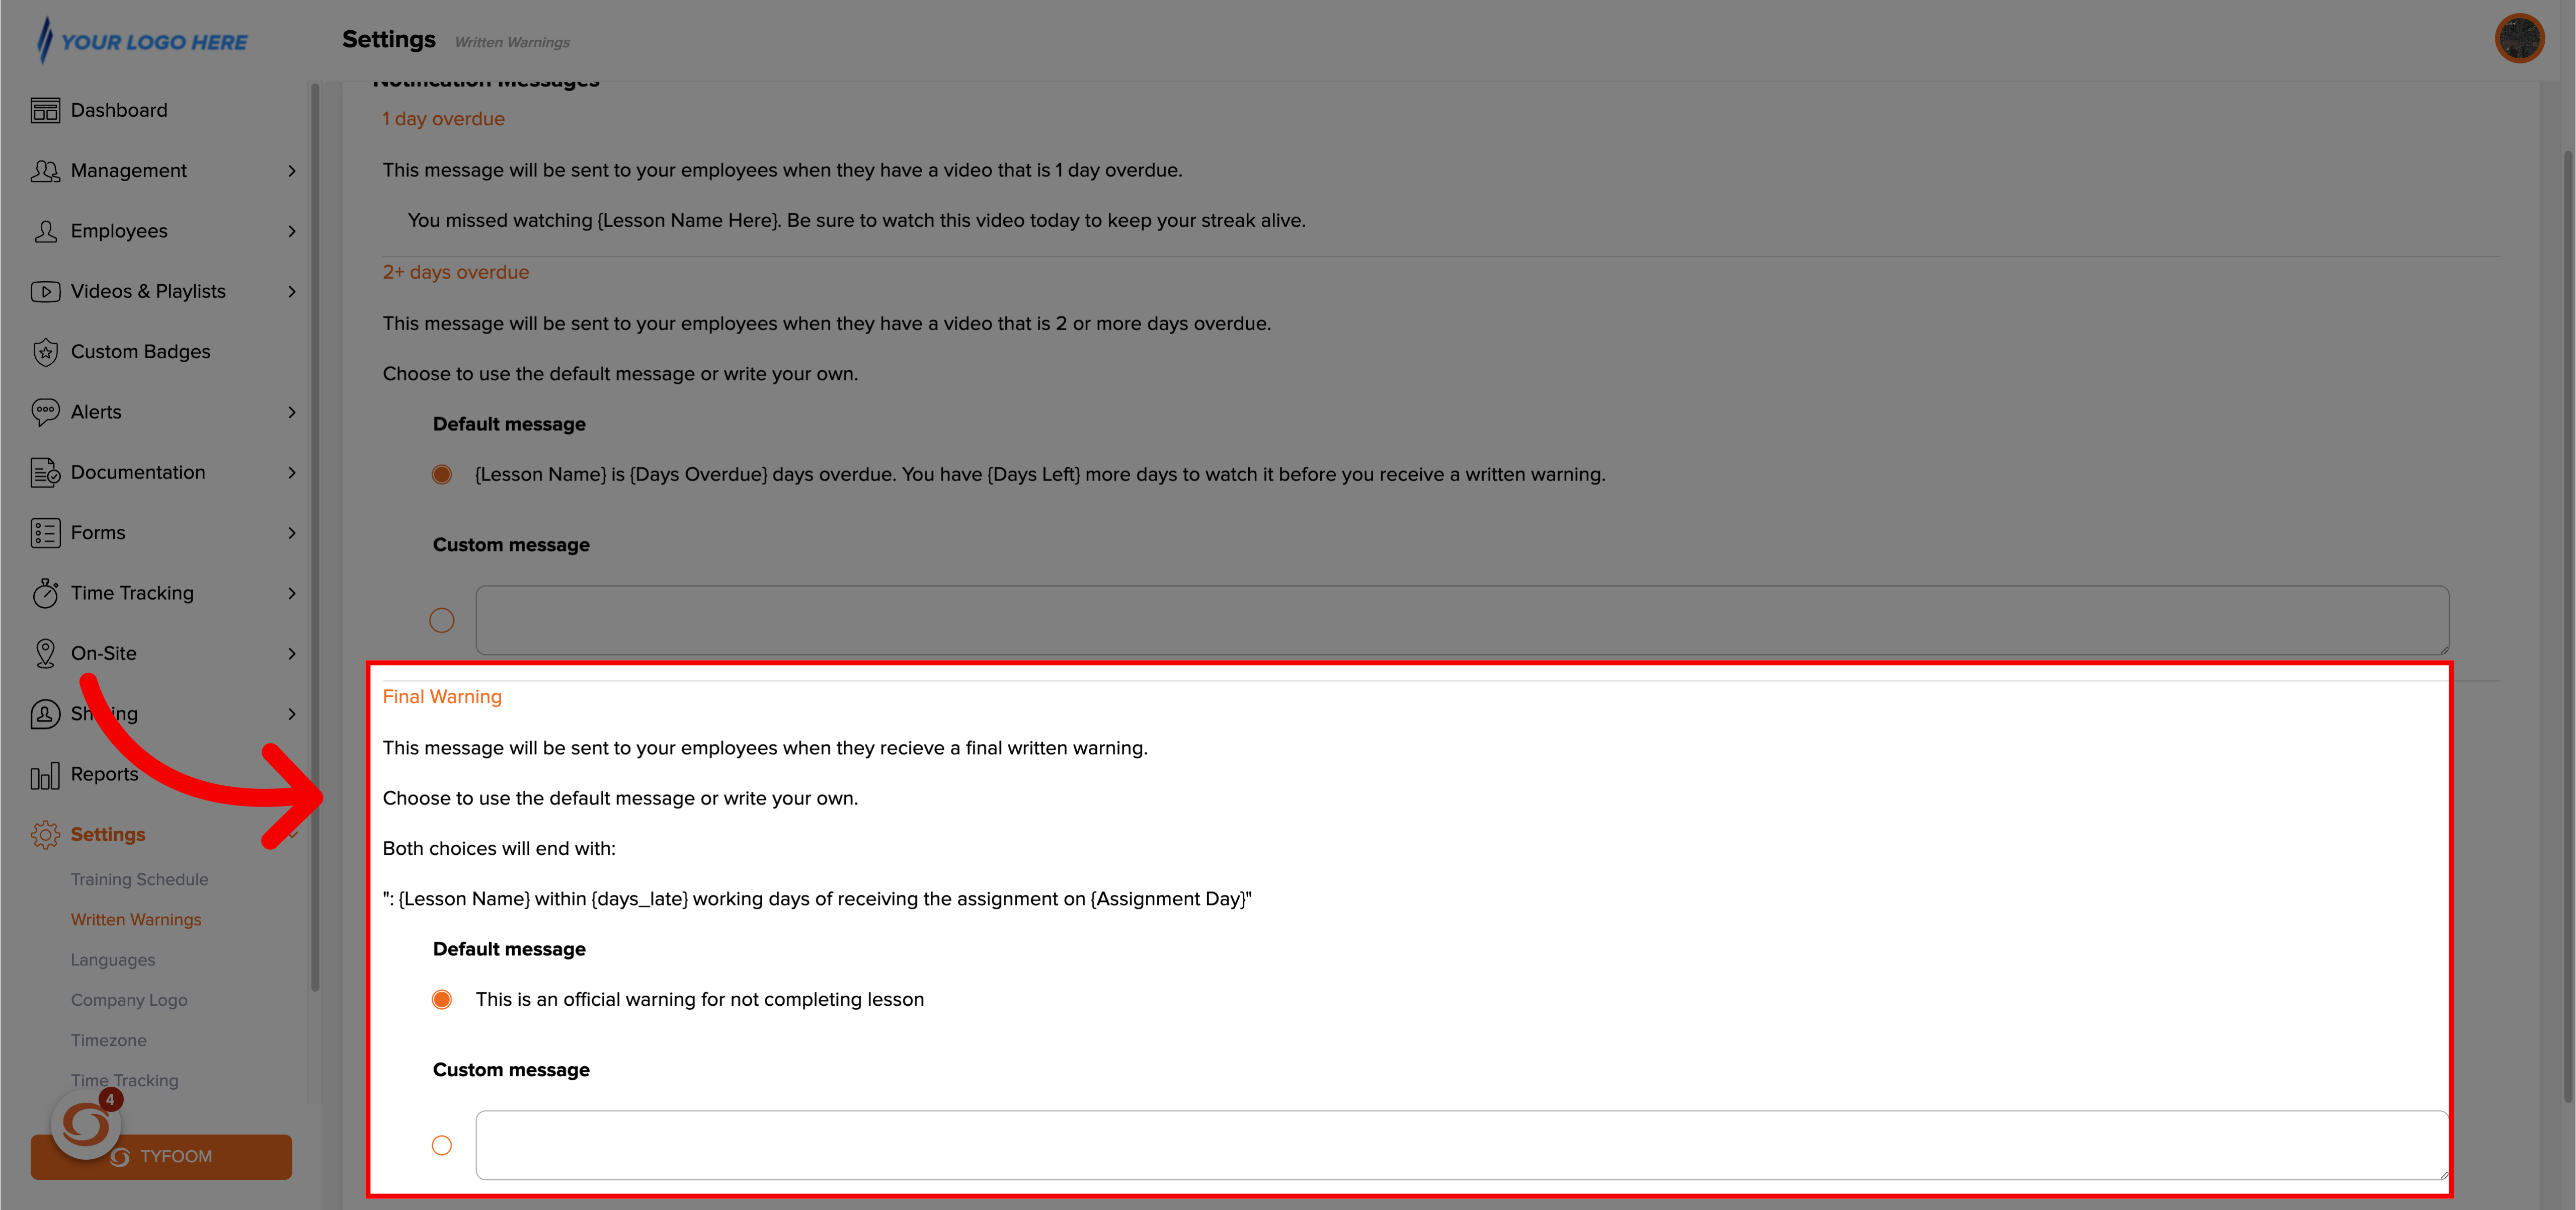
5. Edit 2nd Final Warning
You can choose to do the same thing for the final message that they're sent when they receive a written warning.
6. Click "Update"
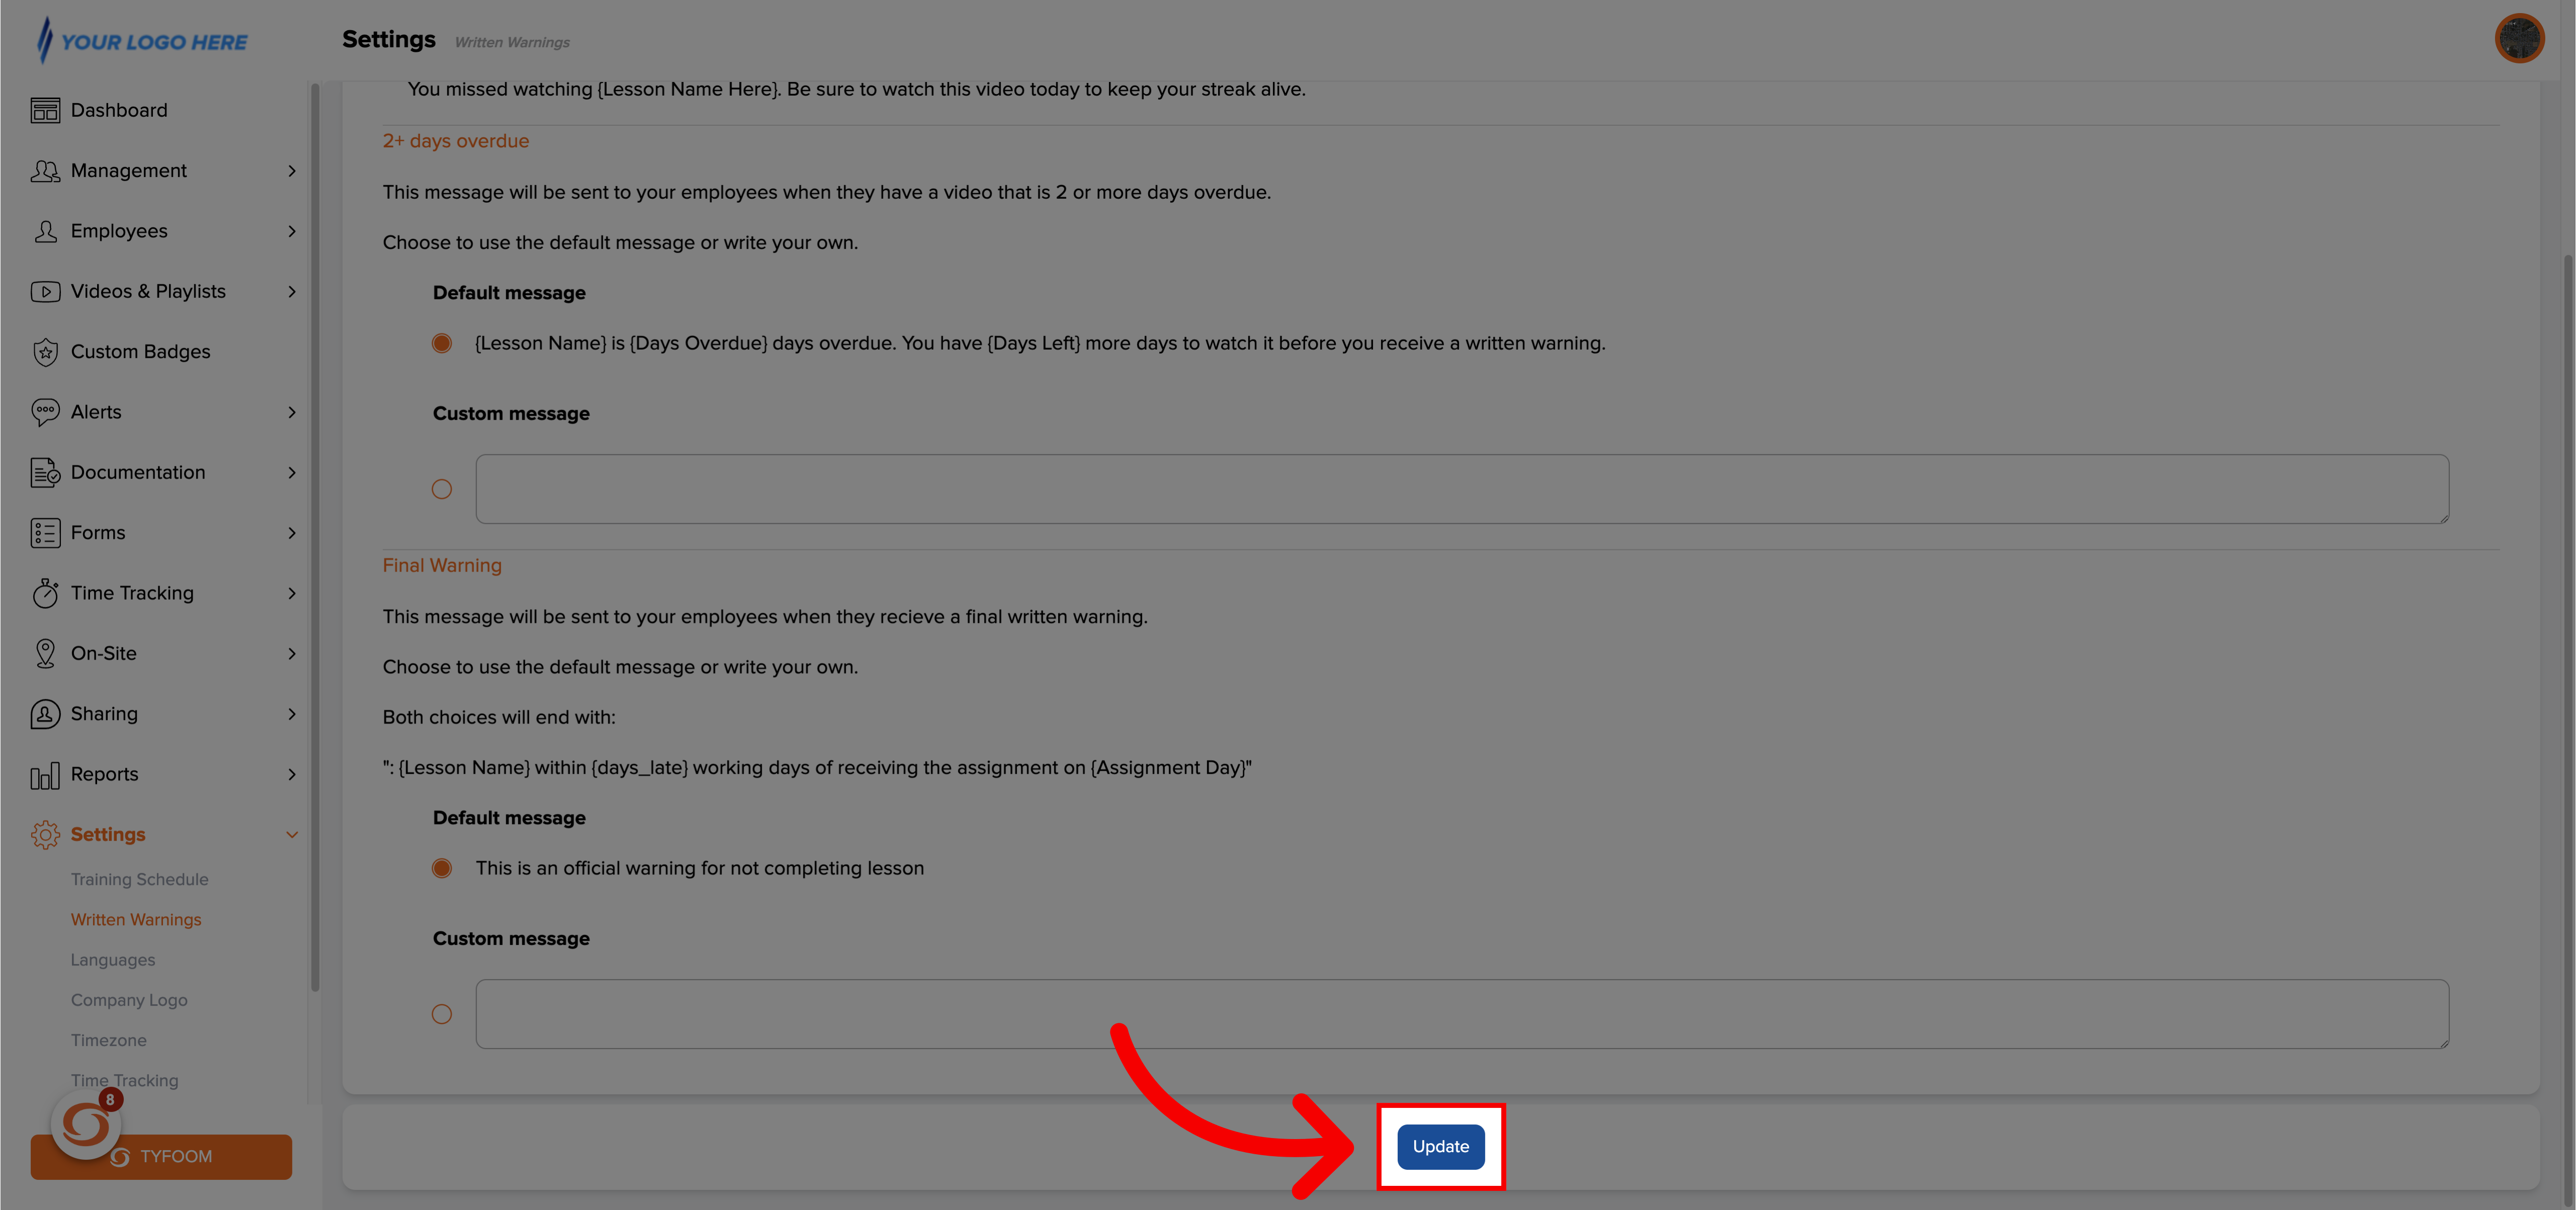
Once you've made your changes click update.
7. Click "Written Warnings"
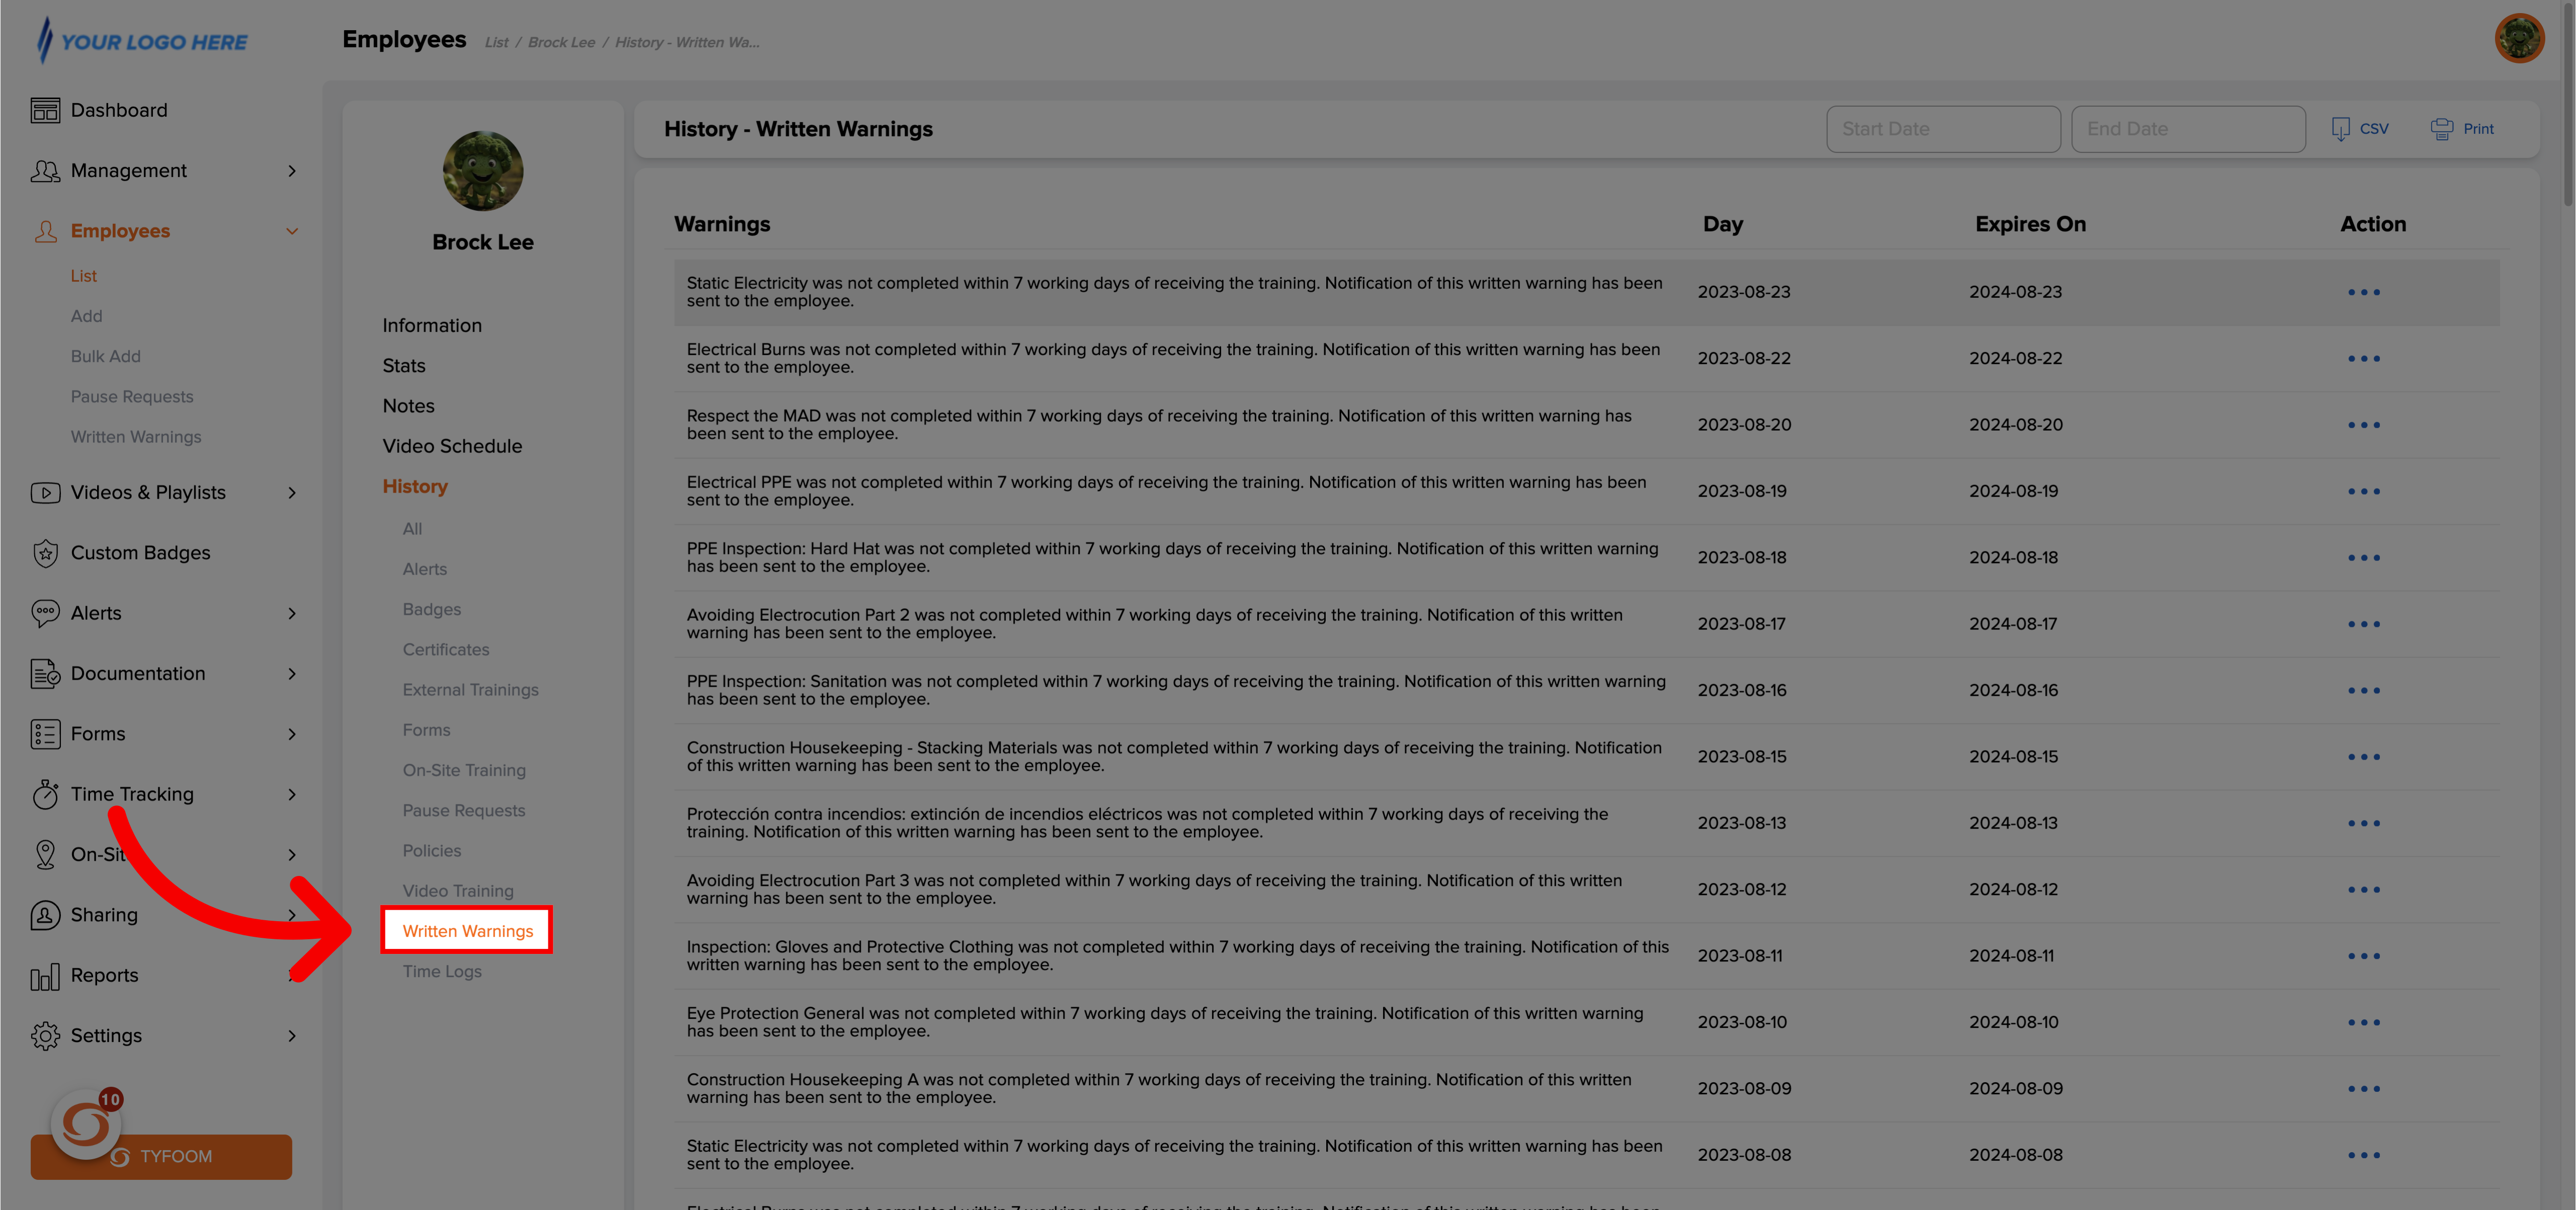
Next, we'll go over how to dismiss a written warning for any employee. This will happen automatically one year after they receive their warning, or you can do this at any time in their employee history. To get started go to an employee's profile and click on written warnings from their history.
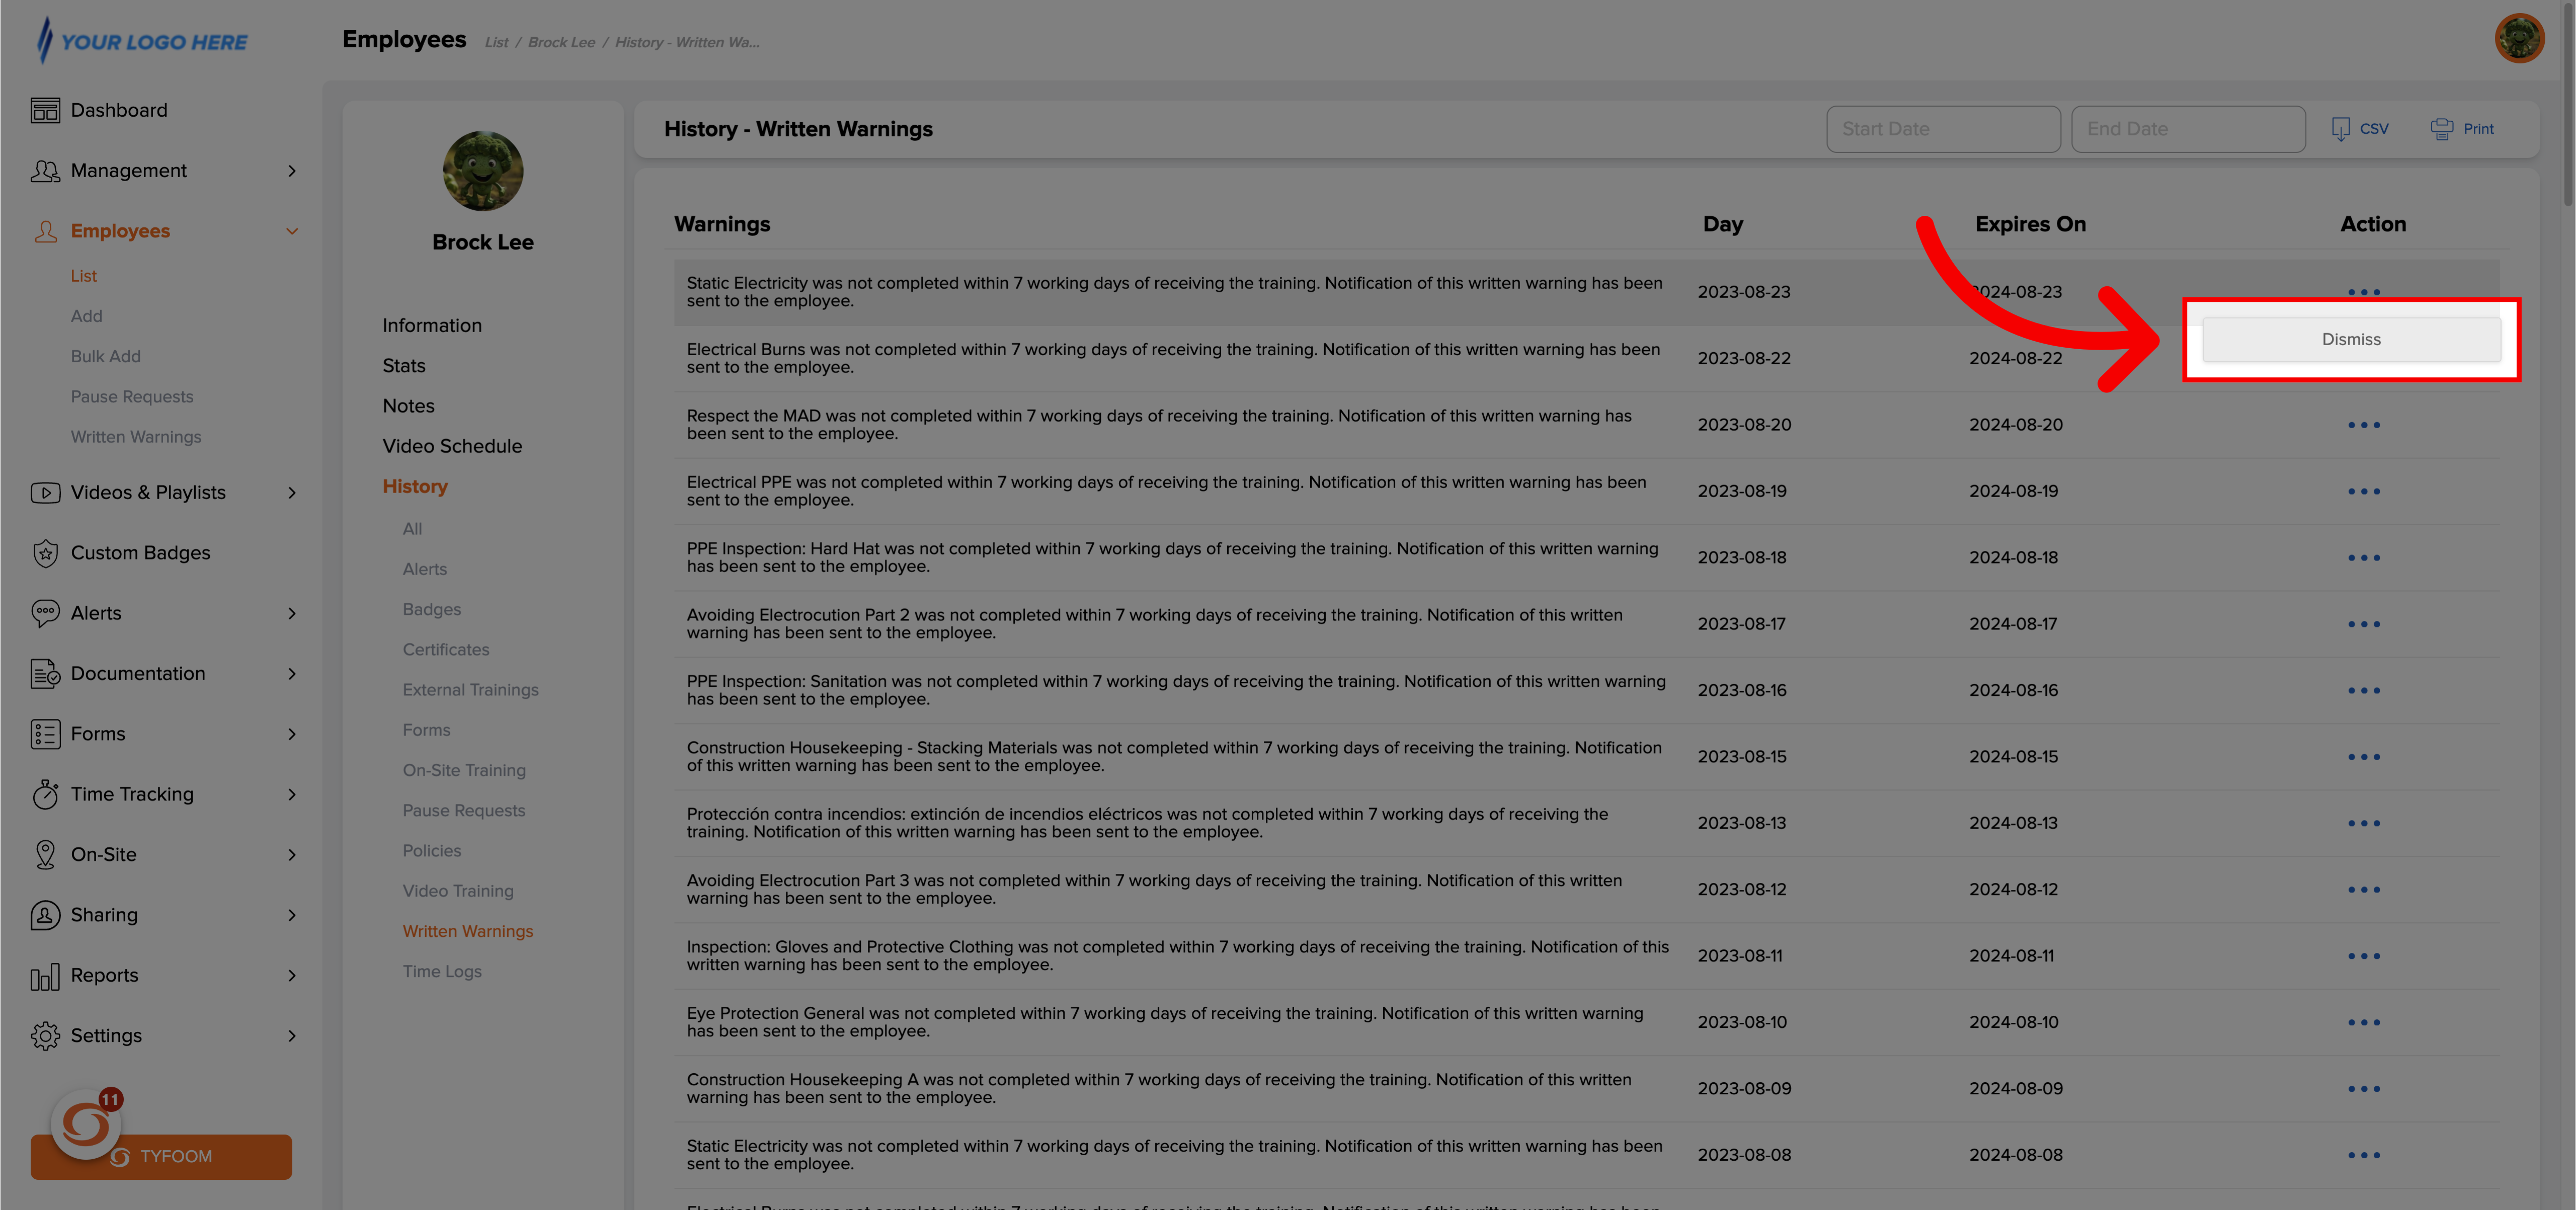
8. Click Action Button
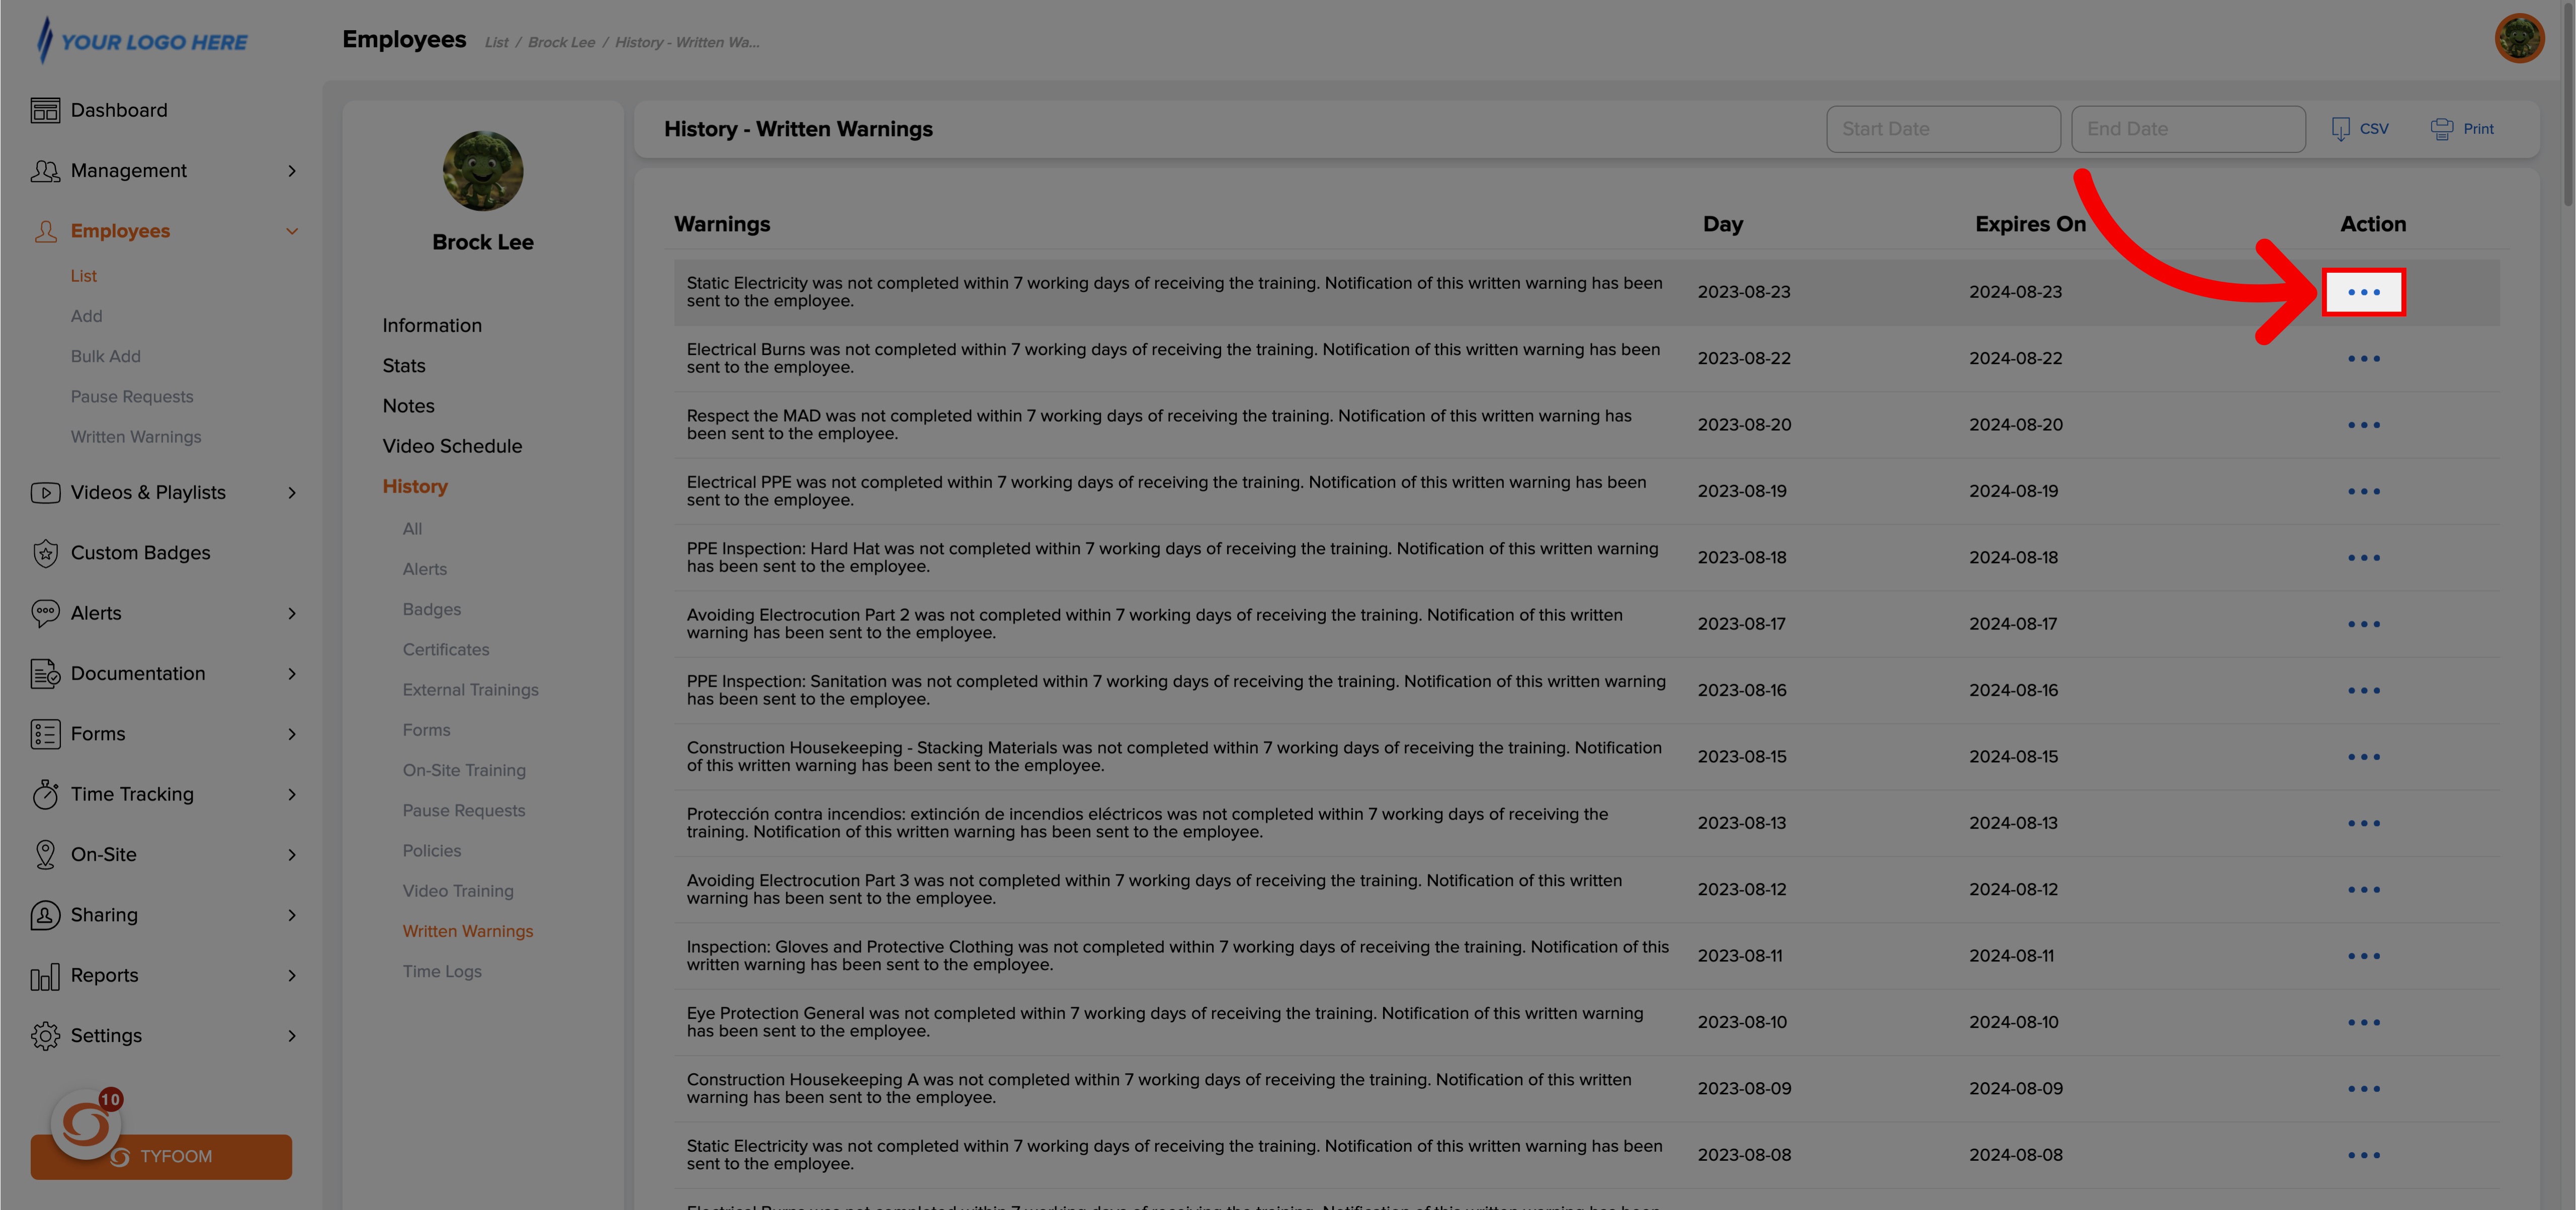
Find the warning that you want to dismiss, and then click the action button to the right.
9. Select "Dismiss"
Then select dismiss.
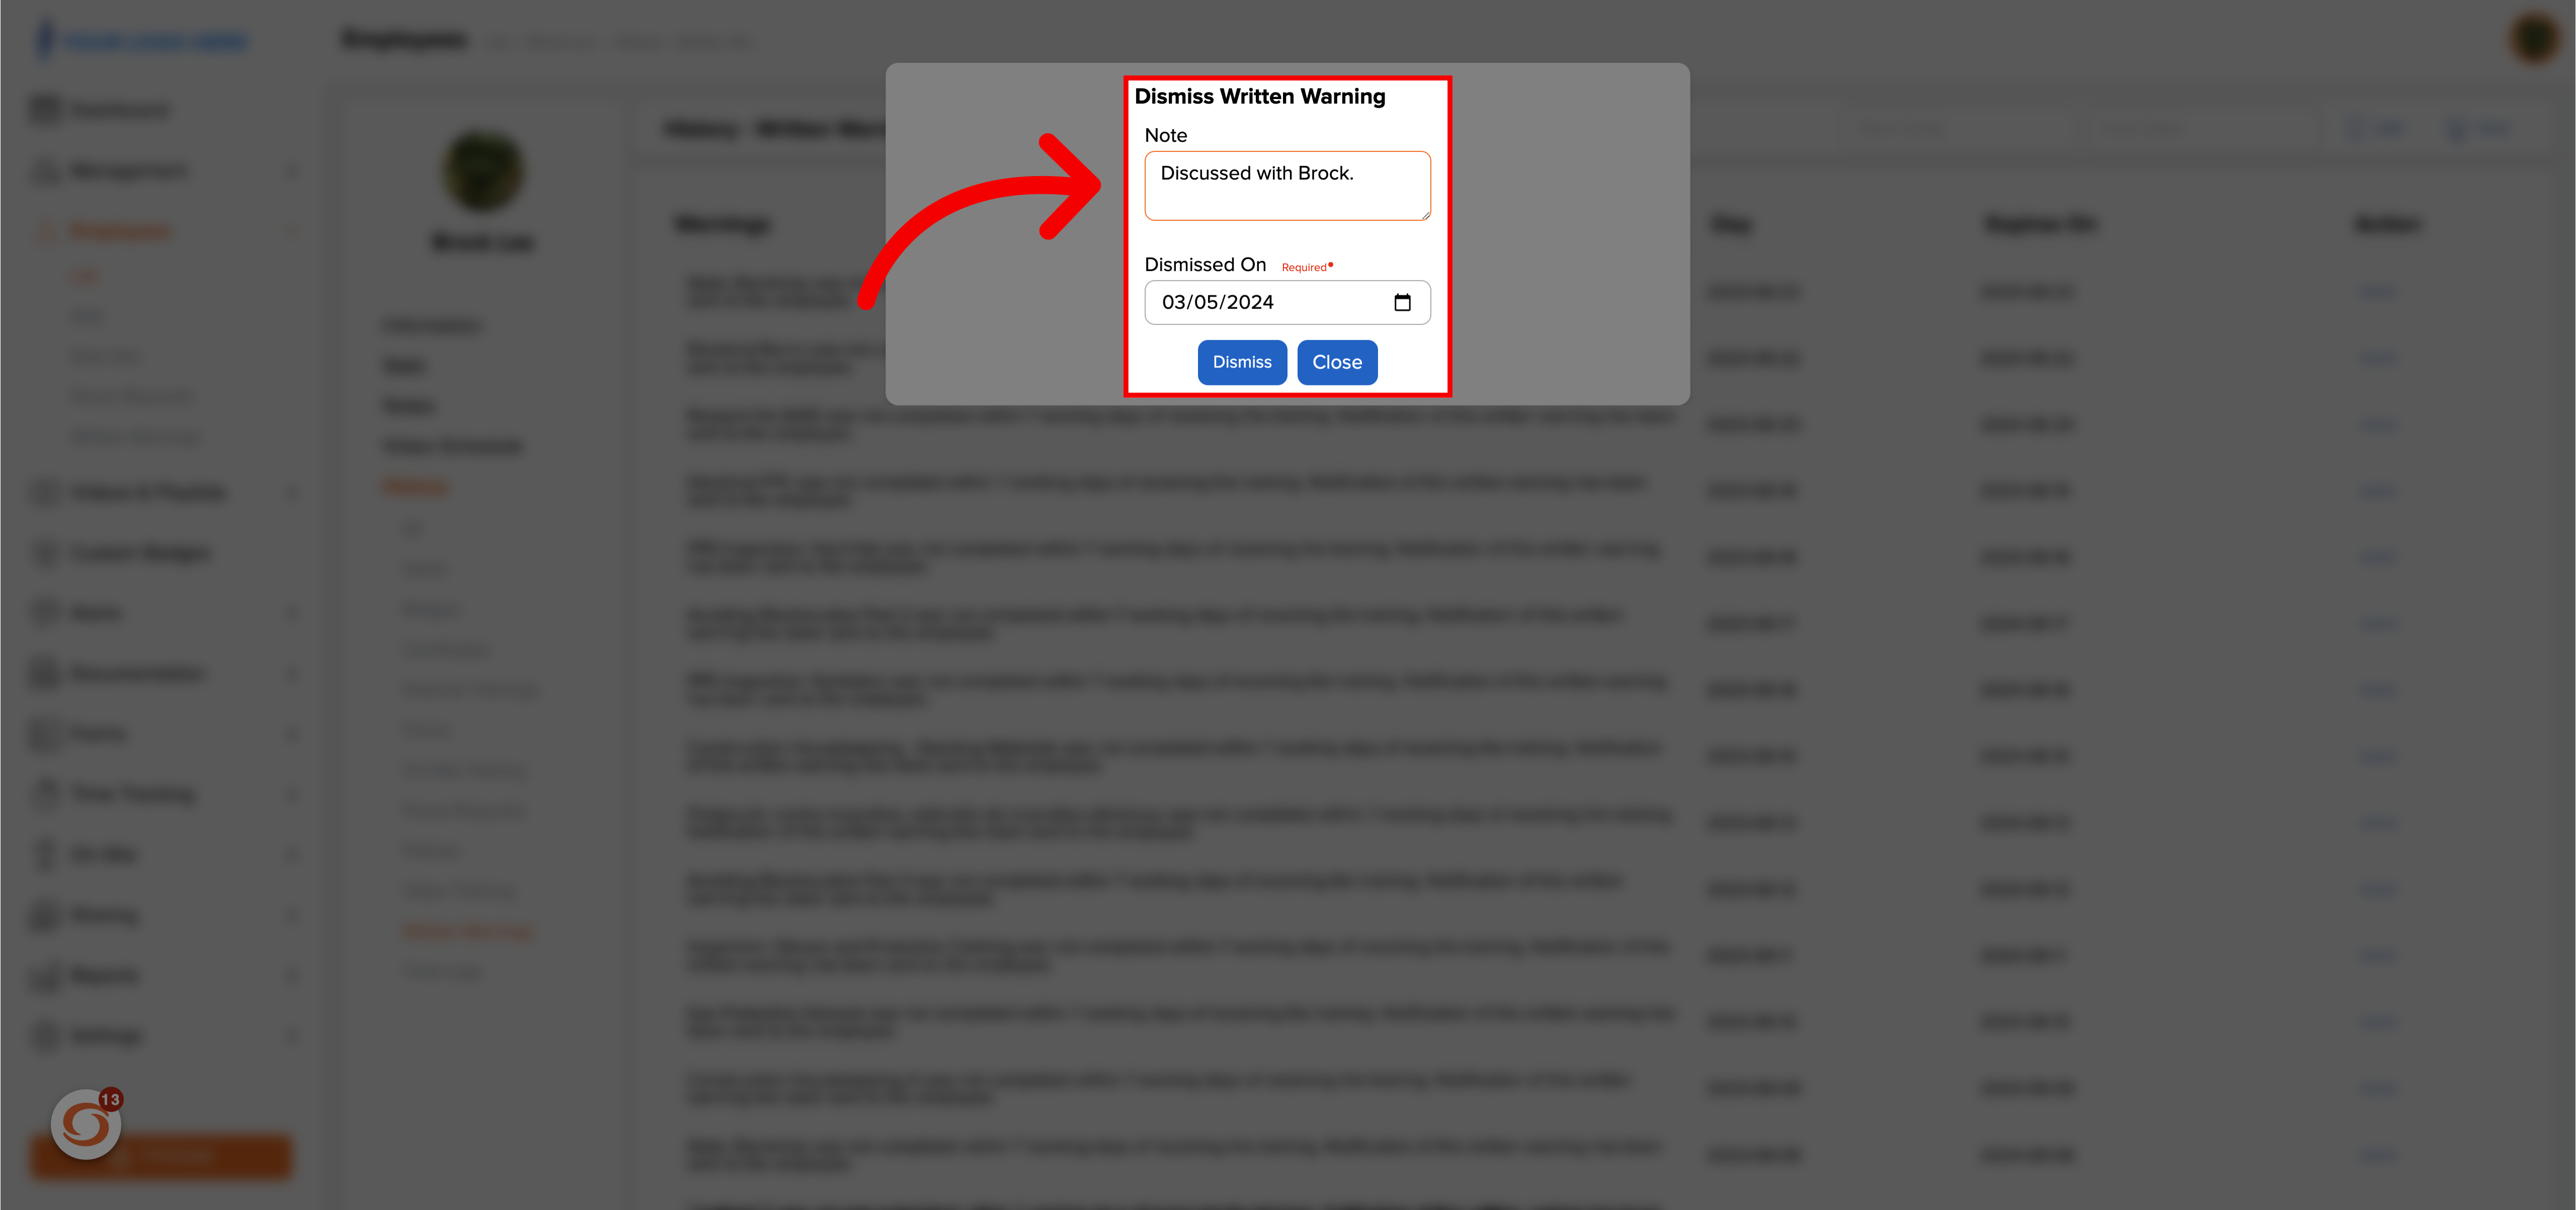
10. Add Note
If you want to you can also add a note or change the dismissal date.
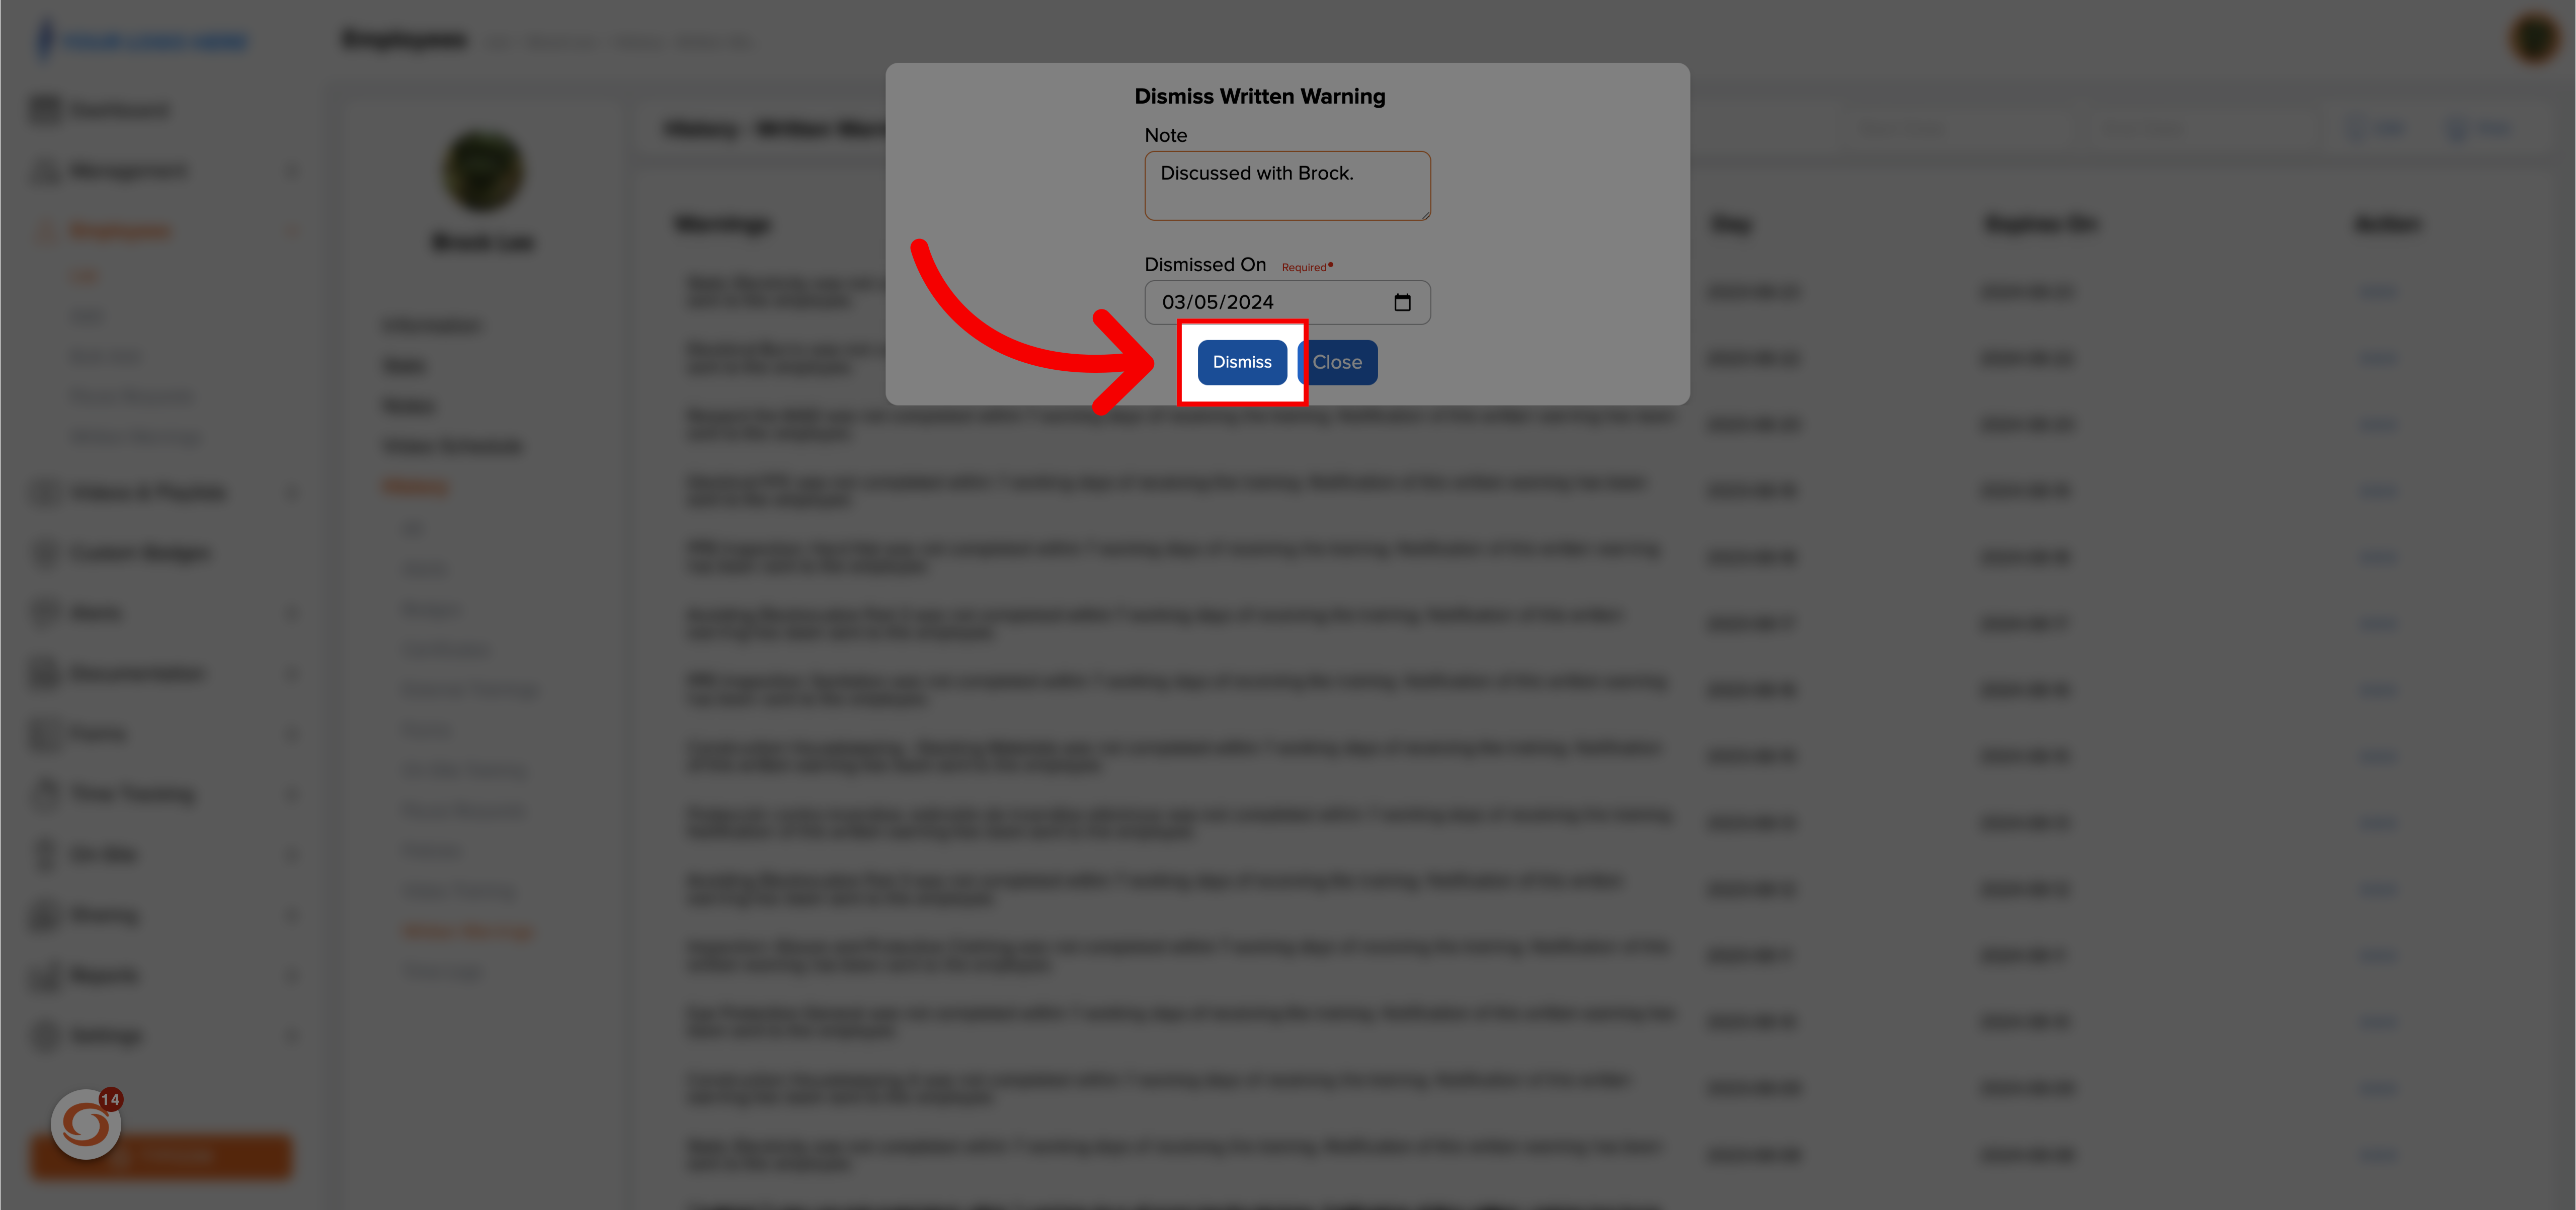
11. Click "Dismiss"
When you're ready click dismiss.
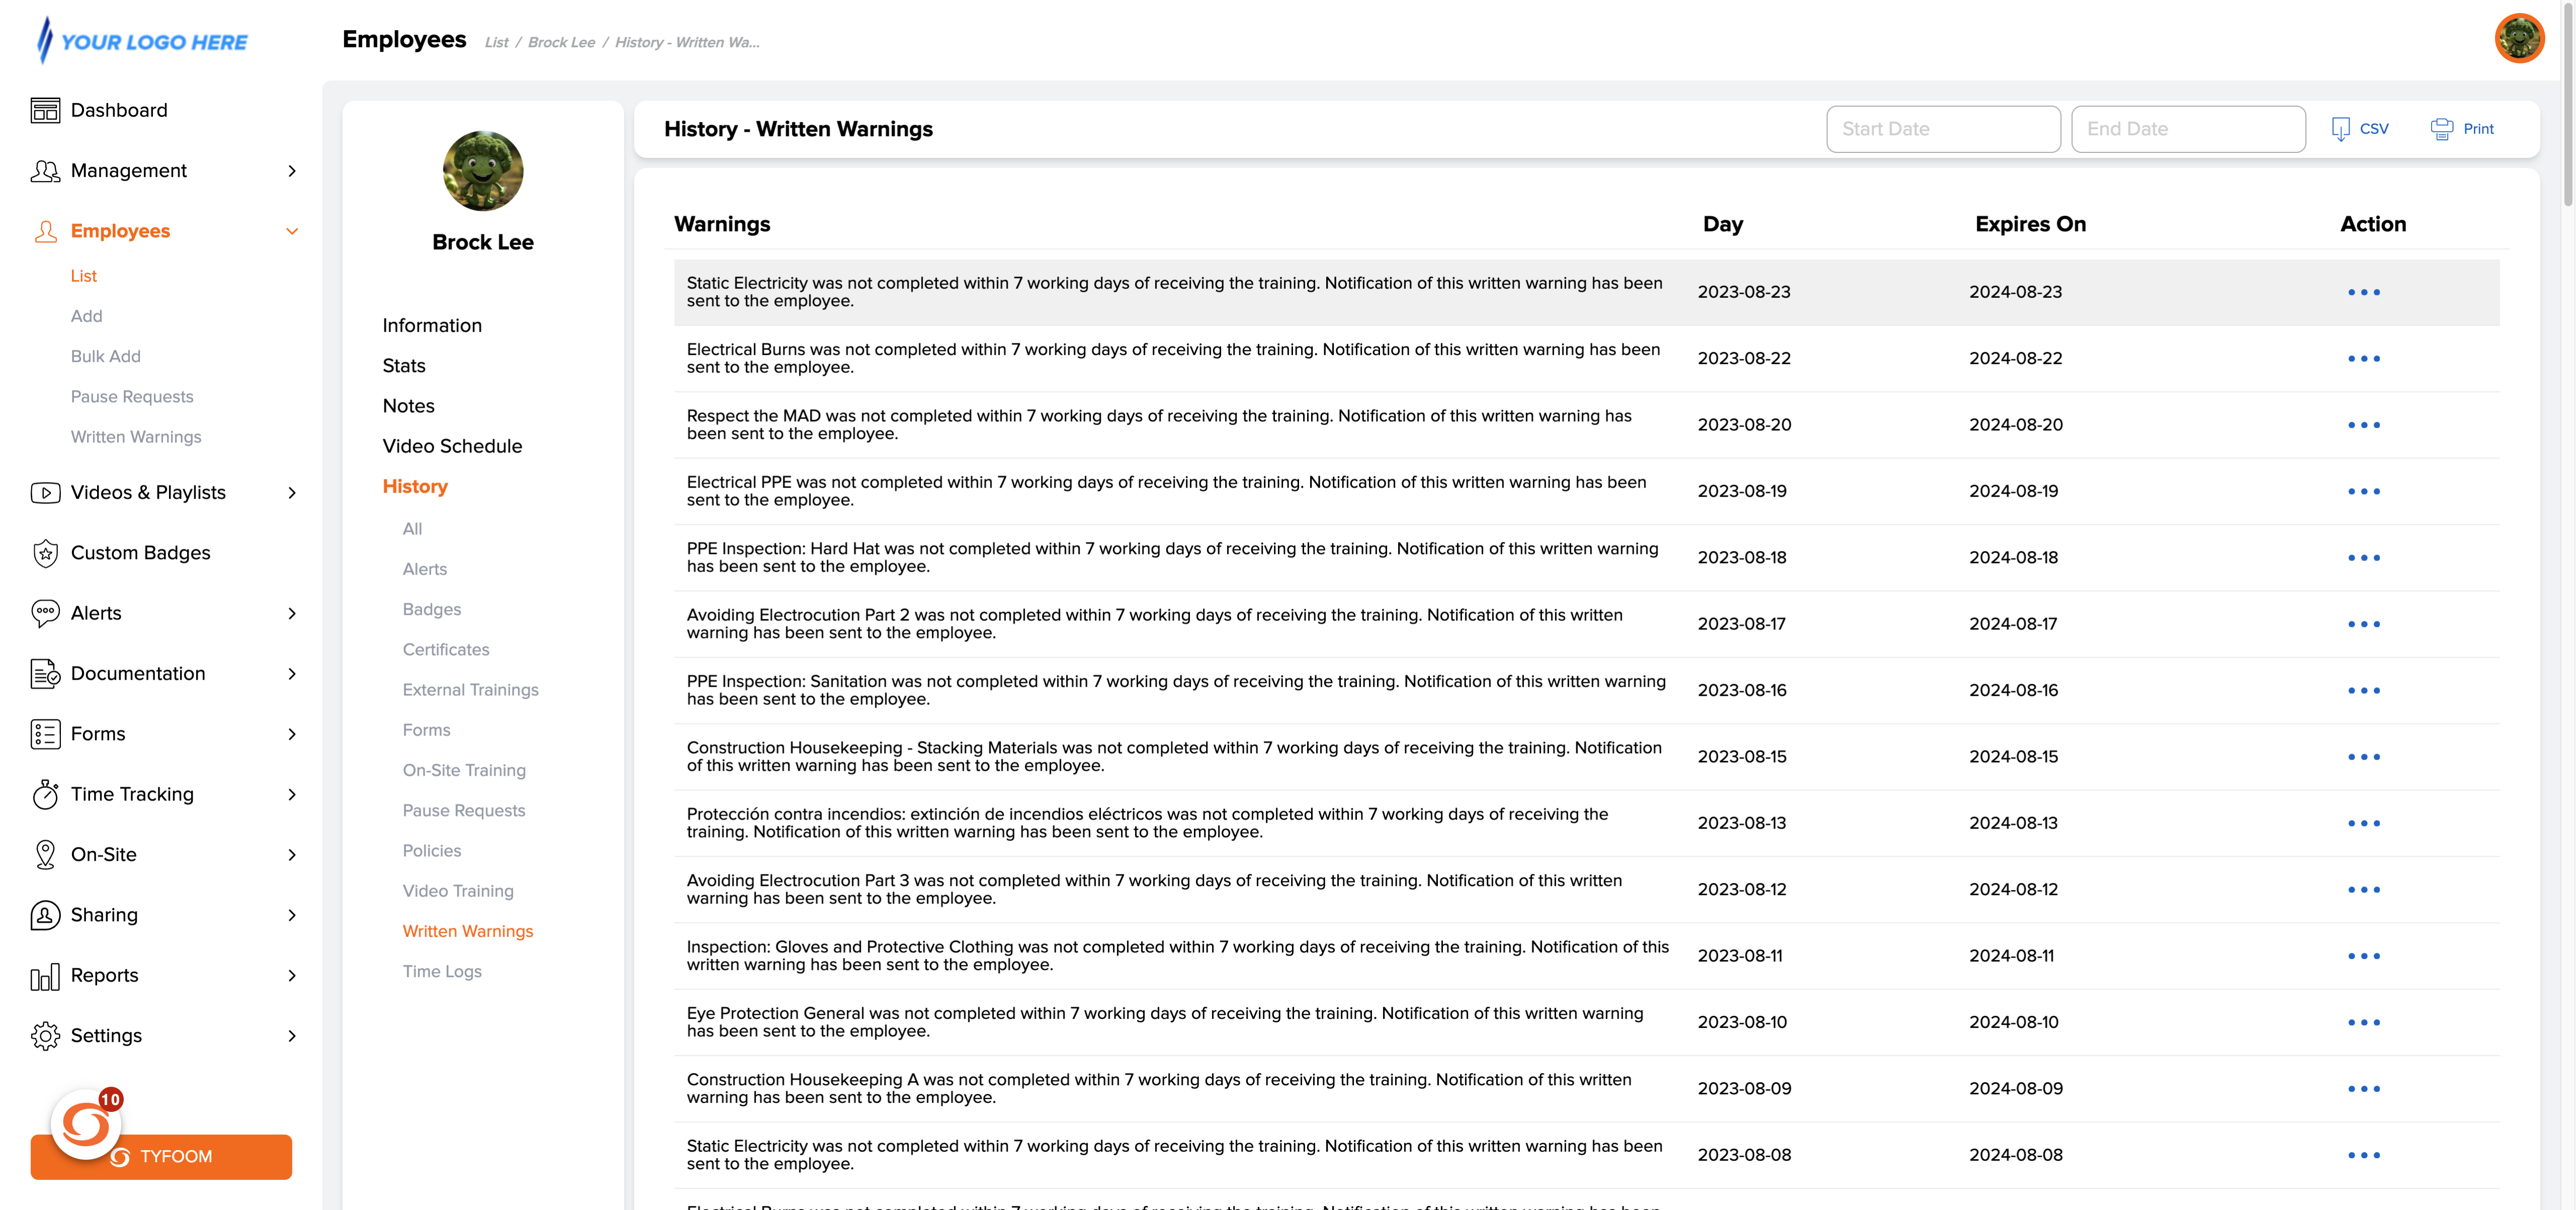
12. Click Action Button
After you've dismissed a written warning you will continue to show in the individual employee's history, but will no longer show as part of their stats or with inside their typhoon map.
If you have any questions, please reach out to us at customercare@.com.
Related Articles
Uploading Users to Tyfoom
Watch the short tutorial on how to upload your users into Tyfoom. Note: When you upload the users into Tyfoom, it will automatically send them an invite to join Tyfoom.Report Video in Tyfoom
In this guide we will go over how to report a video in the Tyfoom app. 1. Open the Library Tab in the Tyfoom app. 2. Then open your Video Library. 3. Select the video you want to report. 4. Tap "Report Video". 5. Choose the appropriate reason for the ...Tyfoom Forms: Conditional Questions
This guide will walk you through the steps to Conditional Questions using Tyfoom. <br> 1. Existing and New Forms You can add conditional questions to an already existing form or a brand new form. You need to be editing the draft version ...Tyfoom + Procore Integration
Integration Overview This integration allows you to automatically upload form responses as PDF files to a Procore project. Adding Tyfoom to Procore In this guide, we’re going to go over how to add Tyfoom to your Procore account. Go to procore.com 1. ...Tyfoom Microsoft OAuth Setup Guide
Tyfoom supports OAuth2 and OpenID Connect. To enable Microsoft SSO for your organization, please complete the steps below and provide the required credentials. 1. Create an Azure App for Authentication Set up an Azure application that Tyfoom will use ...